
Quick Summary
To improve a 3D print’s surface finish, start in the slicer by printing with thinner layers, about 0.12 mm to 0.16 mm for detailed models. Then sand through a grit sequence, starting at 220 and finishing at 800 or higher, with wet sanding for PLA.
- Use 0.12 mm to 0.16 mm layer height for detailed models.
- Slow the outer wall speed for a cleaner face.
- Turn on ironing to melt flat top surfaces smooth.
- Sand PLA at 220, then 400, then 800 grit or higher.
- Never skip grit steps, since jumping from 220 to 800 leaves scratches.
Table of Contents
- Start With Slicer Settings: Layer Height, Speed and Orientation
- What Grit Sandpaper for 3D Prints PLA Works Best
- How to Improve 3D Print Surface Finish at Home Step by Step
- Using Filler Primer and 3D Print Finishing Spray
- Polishing 3D Prints for a Glossy or Matte Look
- Fixing Common Surface Artifacts Like Ghosting and Z-Banding
- Choosing the Right Finish for Your Next Project
- Frequently Asked Questions
How Do You Improve a 3D Print’s Surface Finish?
Last Updated: November 3, 2026
Start With Slicer Settings: Layer Height, Speed and Orientation
A smooth 3D print starts long before the first sanding pass. For a deeper guide to diagnosing and fixing layer issues, see our walkthrough.
Surface finish is mostly about how thin each layer is and how fast the printer moves while it lays that layer down. Thinner layers hide the stepped look that makes a print look like a stack of coins.
Here is where most beginners should start:
- Lower the layer height. Try 0.12 mm to 0.16 mm for detailed models.
- Slow the outer wall speed. Many users print outer walls slower than infill for a cleaner face.
- Turn on ironing for flat tops. This passes the nozzle over the top surface to melt it smooth.
Layer height and nozzle diameter
Layer height and nozzle diameter work together. A 0.4 mm nozzle can print layers as thin as about 0.1 mm, though thinner layers take longer. Watch out: setting a layer height that is too close to your nozzle size can cause poor adhesion between layers.
Many hobbyists find that a 0.2 mm layer height is a good balance of speed and detail. Drop to 0.12 mm only on parts where the surface matters most.
Print orientation and support placement
How you place a part on the bed changes how its surface turns out. Curved surfaces show stair-stepping most when they are printed upright, so tilting a model can reduce the visible lines on its best face.
Supports leave small scars where they touch the model. Place supports on hidden faces or low-visibility areas, and you will spend less time cleaning up those marks later.
What Grit Sandpaper for 3D Prints PLA Works Best
Sanding is the most common next step after printing, but the right grit sequence depends on the filament. Most guides give one PLA recipe and stop there. The breakdown below covers the four filaments hobbyists actually print, plus what each step costs so you can decide how far to go.
Grit progression by material
- PLA: start at 220 grit to knock down layer lines, move to 400, then finish at 800 or higher. Wet sanding with a little water keeps dust down and gives a smoother result. Let the part dry fully before painting or coating.
- PETG: start at 320 rather than 220, because coarse paper tears and gums. Sand wet, rinse the sheet often, and finish at 1,000-1,500 grit. PETG scratches show through gloss coats, so do not skip intermediate grits.
- ABS: 220 grit cuts quickly, then 400, 800, and 1,500. ABS takes a high polish well and is the most forgiving of the four for beginners.
- TPU: use 400-600 grit only, with light pressure. Coarse paper tears the flexible surface and leaves fuzzy edges that cannot be sanded out.
Starting too coarse gouges the print and creates more work. Starting too fine means you spend a long time removing layer lines. A middle starting point saves both time and frustration.
Wet versus dry sanding
Wet sanding is a common choice for PLA, PETG, and ABS. Water keeps the paper from clogging, reduces airborne dust, and leaves a more even scratch pattern. Dry sanding is faster for rough shaping on ABS but generates fine plastic dust that you should capture with a vacuum or damp cloth. Do not wet-sand parts that contain moisture-sensitive inserts or unfinished electronics.
Cost-benefit: how far should you go?
You do not need a full shop to get a good finish. A common pattern is to match the effort to the part:
A common mistake is skipping grit steps. Jumping from 220 to 800 leaves scratches that show up under paint. Work through each grit until the scratches from the previous one are gone, then move on.
Sanding generates fine plastic dust, so work in a ventilated area and wipe surfaces with a damp cloth rather than dry-brushing the dust into the air.
How to Improve 3D Print Surface Finish at Home Step by Step
Here is a simple process you can follow at home:
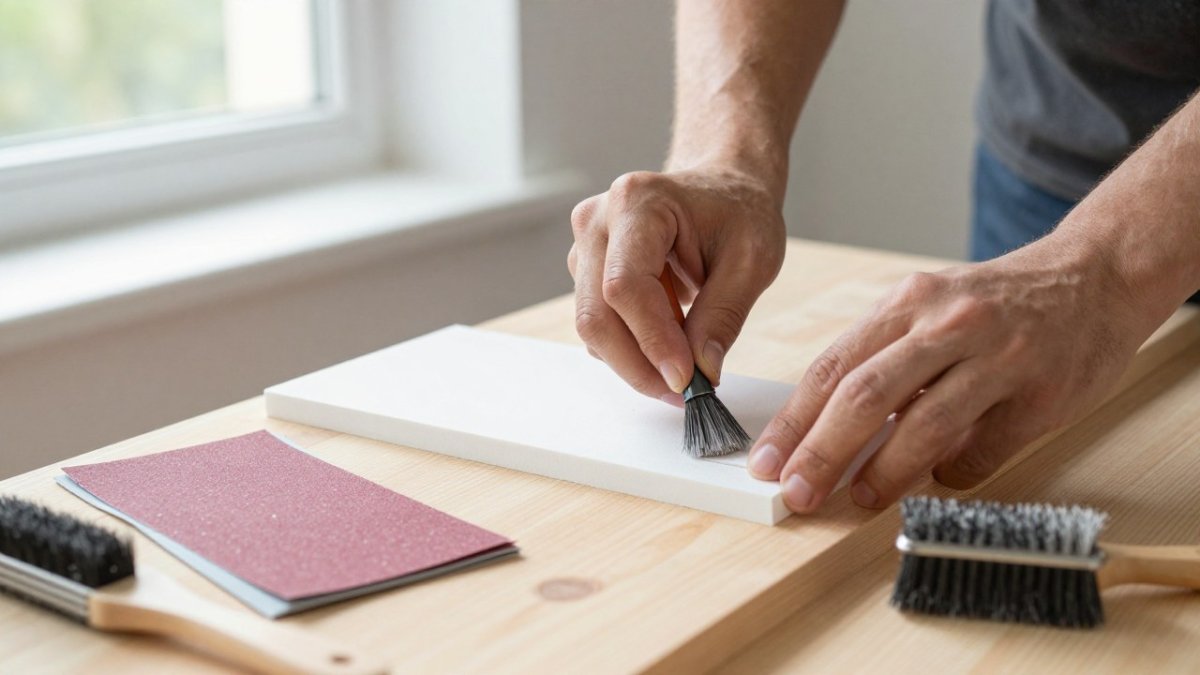
- Print with fine layers. Use 0.12 mm to 0.16 mm for the best starting surface.
- Remove supports carefully. Snap them off slowly to avoid chipping the surface.
- Sand with 220 grit. Work evenly and check for flat spots.
- Move to 400 grit. Sand until the layer lines fade.
- Finish with 800 grit or higher. Use light pressure for a smooth feel.
- Clean the part. Wipe off dust before you apply any primer or coating.
A common mistake is skipping grit steps. Jumping from 220 to 800 grit can leave scratches that show up under paint.
Here is the step-by-step process for improving a print’s surface at home, with the grit or action for each step.
| Step | What to do | Time or frequency |
|---|---|---|
| 1. Print with fine layers | Use 0.12 mm to 0.16 mm layers | Before printing |
| 2. Remove supports carefully | Snap them off slowly | Right after printing |
| 3. Sand with 220 grit | Work evenly, check for flat spots | Initial pass |
| 4. Move to 400 grit | Sand until layer lines fade | Until lines fade |
| 5. Finish with 800 grit or higher | Use light pressure | Final sanding |
| 6. Clean the part | Wipe off dust before priming or coating | Before coating |
Using Filler Primer and 3D Print Finishing Spray
Filler primer fills in small gaps and pits that sanding leaves behind. Apply a thin coat, let it cure, then sand it back with fine paper. Thin coats work better than thick ones, which can drip and hide detail.
Some users find a finishing spray helps even out the surface. Test any spray on a scrap piece first, since some sprays react with certain plastics.
Polishing 3D Prints for a Glossy or Matte Look
Once the surface is smooth, the final look comes down to two decisions: whether you want a mechanical polish or a chemical one, and whether the result should read glossy or matte. The right choice depends heavily on the filament, because each plastic responds differently to abrasives, solvents, and heat.
Mechanical polishing by material
Mechanical polishing works on every common filament, but the grit progression and pressure change with hardness.
- PLA is the easiest to polish. After sanding to 800 grit, move to 1,500 and then 2,000 grit wet paper, then buff with a soft cloth and a plastic polishing compound. PLA softens near 140°F, so keep buffing slow and let the part cool between passes.
- PETG gums up sandpaper quickly. Use wet paper from the start and rinse the sheet often. Finish at 1,500 grit, then buff lightly, heavy pressure smears the surface instead of cutting it.
- ABS sands cleanly and takes a high gloss well. Work up to 2,000 grit, then buff with compound. A quick wipe with a small amount of acetone on a rag can reflow the surface, but see the safety notes below before trying it.
- TPU is flexible and will not hold a crisp gloss. Sand lightly at 400-600 grit to knock down layer lines, then apply a matte flexible coating rather than trying to buff it.
One common approach is to stop one grit short of the final finish, apply a thin filler primer, sand that back, and then polish.
Chemical smoothing and vapor polishing
Chemical smoothing dissolves the outer skin of the print so layer lines flow together. It produces the glassiest finish available, but it is the step where most beginners get hurt or ruin a part.
- ABS and ASA respond to acetone vapor. Place the part in a sealed glass container with a small dish of acetone nearby, not touching the part, and let the vapor work for 10-30 minutes, checking every few minutes. Longer exposure softens details and can slump thin walls.
- PLA does not vapor-smooth well with acetone. A common alternative is a short dip in a solvent such as dichloromethane or a commercial PLA smoothing agent, but these are aggressive and should only be used with full PPE and ventilation.
- PETG has no reliable household vapor method. Mechanical polishing plus a clear coat is the practical route.
- TPU should not be vapor-smoothed; solvents swell and degrade it.
Watch out: acetone is highly flammable, and its vapor is heavier than air, so it collects in low spaces. Work outdoors or in a fume hood, wear nitrile gloves and eye protection, keep the container away from flames and sparks, and never heat acetone directly.
Glossy versus matte topcoats
After polishing, a topcoat locks in the look and adds scratch resistance.
- Glossy: a clear acrylic or polyurethane clear coat, applied in two thin passes, gives the deepest reflectivity. Gloss amplifies every remaining scratch, so only apply it after the surface is truly flat.
- Matte: a matte clear coat scatters light and hides fine sanding marks, which makes it the forgiving choice for functional parts and props. It also tends to show fingerprints less than gloss.
Test any coating on a scrap print first. For a ready-made option, consider a water-based protective coating in glossy and matte finishes. Some solvent-based sprays attack PLA and PETG and leave a cloudy or wrinkled surface.
Polishing does not hide every flaw. Fixing major layer problems and warping before this step helps, because a topcoat can make them more visible.
Fixing Common Surface Artifacts Like Ghosting and Z-Banding
Some surface problems come from the printer itself. Ghosting shows up as faint ripples near sharp corners. Z-banding appears as regular horizontal bands along the height of the print.
To reduce ghosting, slow the print speed and check that your printer’s frame and belts are tight.
If the print is warped, sanding will not fix it, so address warping first by improving bed adhesion and cooling. Our complete guide to fixing warped prints covers this in detail.
Choosing the Right Finish for Your Next Project
The right finish depends on the project. Display pieces and miniatures benefit from fine layers, careful sanding, and a glossy or matte coat. Functional parts often need less finishing, so a light sanding and a clean print may be enough.
Start with the slicer settings, then work through sanding and coating in order. Each step makes the next one easier. With practice, you will know which steps your projects need and which you can skip.
Frequently Asked Questions
What grit sandpaper should I use for PLA 3D prints?
Most PLA prints start well with 180 to 220 grit to remove layer lines and stringing, then move to 400 grit for a smoother base. Finer grits of 800 and above are useful before polishing or priming. Wet sanding with a few drops of water reduces dust and gives a more even result. Always sand gently, because PLA softens with heat and too much pressure can round off fine details on the part.
Can you smooth a 3D print at home?
Yes. Sanding, filler primer, and light polishing can all be done with basic tools at home. Chemical smoothing is also possible with some materials, but it requires ventilation and safety precautions. Start with mechanical methods, since they are cheaper and easier to control. Test any new method on a spare print or a hidden area before working on your best piece.
Does sanding improve the surface finish of a 3D print?
Sanding is one of the most effective ways to improve the surface finish of a 3D print because it physically removes layer lines and small imperfections. Progressing through several grits, from coarse to fine, gives the smoothest result. Sanding works best after a filler primer has been applied to cover deep gaps, since priming and sanding together produce a much more uniform surface.
What is the best surface finish for 3D printing?
The best finish depends on your goal. For functional parts, a clean as-printed surface with fine layer height may be enough. For display pieces, sanding and primer followed by paint or a clear coat usually looks best. Glossy finishes often come from polishing or smoothing treatments, while matte finishes come from sanding and a flat spray. Choose the finish that matches how the part will be used.





0 Comments