
Last Updated: November 1, 2026
Quick Summary
Organize a pottery studio by mapping the clay’s path first, then placing furniture along that path. Mark the wheel position, put the wedging surface within one step of it, and keep glazing on the opposite side from dry clay.
- A working studio needs five zones: dusty, clean, wet, storage, and firing.
- Set wheel height so you sit upright with elbows slightly above the wheel head.
- Never store clay, paper, or finished work against the kiln.
- Wipe surfaces with a wet sponge and use a HEPA vacuum instead of sweeping.
- Fund the wheel and kiln access first, the safety layer second, containers last.
Table of Contents
- Start with a Pottery Studio Workflow, Not a Floor Plan
- Pottery Studio Layout: Zoning a Space That Fits Your Work
- Separating Clean and Dusty Work Areas for Safety
- Pottery Studio Storage Ideas for Clay, Tools, and Finished Work
- Small Pottery Studio Organization That Actually Works
- Budgeting and Equipment Priorities Before You Buy
- Plan Your Studio Setup with Craft Living Artistry
- Frequently Asked Questions
Start with a Pottery Studio Workflow, Not a Floor Plan
Most people organize a studio by staring at the empty room and guessing where things go. That is backwards. The potters who avoid chaos do it the other way around: they map the clay’s path first, then place furniture along that path. A pottery studio is easier to organize as a workflow problem before it is a furniture problem. Get the flow right and the room almost arranges itself.
Map the Clay Path from Wedging to Firing
Clay moves through a predictable sequence: store, wedge, throw, dry, trim, bisque fire, glaze, glaze fire. Every step needs its own spot, and each spot should sit next to the one before it.
- Clay storage near the wedging table
- Wheel within a step of the wedging surface
- Drying shelf close to the wheel, away from foot traffic
Walk this path in your head before you move a single shelf. For the drying stage specifically, learning how to dry pottery clay without cracks before you build the shelf saves a lot of heartbreak later.
Identify Your Non-Negotiable Zones
A working ceramic studio needs five zones no matter how small it is: a dusty zone, a clean zone, a wet zone, a storage zone, and a firing zone. Some can share space. None can be skipped.
The dusty zone handles clay, wedging, and dry trimming. The clean zone is for glazing and finished work. Keep them apart. That single rule prevents most of the mess and health problems covered below.
Pottery Studio Layout: Zoning a Space That Fits Your Work
A good pottery studio layout puts the wheel at the center of a triangle formed by the wedging table, the water bucket, and the tool cart. Everything else radiates outward from that triangle. This is the step-by-step approach we recommend:
- Mark the wheel position first, with clear space behind it to sit and swing.
- Place the wedging surface within one step of the wheel.
- Add a tool cart or small table at your throwing side.
- Set the drying shelf against a wall out of the walking path.
- Put clay storage near the entrance so deliveries land where they belong.
- Reserve a corner or separate room for the kiln.
- Keep glazing on the opposite side from dry clay.
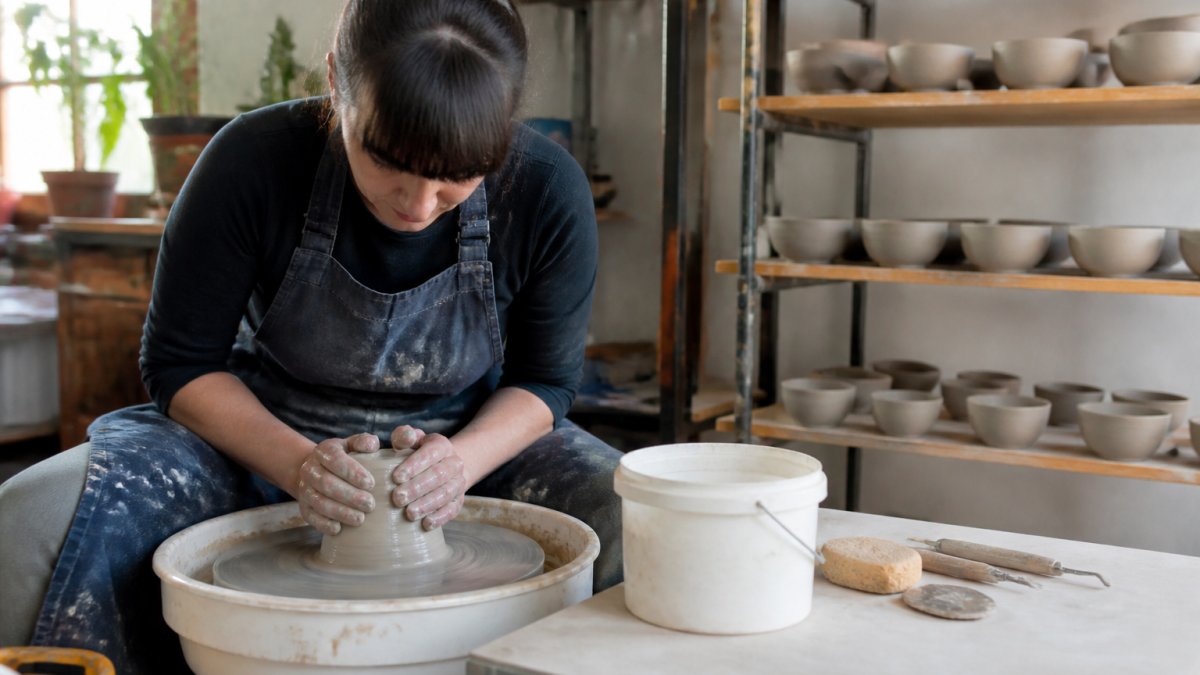
Wheel Placement and Work Surface Height
Put the pottery wheel where you can sit upright with your elbows slightly above the wheel head. Wheel height is best set around your own body, so test it with a stool before you commit.
Work surfaces should sit just below elbow height for standing tasks. A common mistake is building counters too high, which forces you to hunch over the wheel all day.
Kiln Room Placement, Clearance, and Electrical Requirements
The pottery kiln is the one piece of equipment that can turn a studio mistake into a fire or a failed inspection.
Electrical capacity is the part most home-studio guides skip. Electric kilns generally need a dedicated circuit sized to the kiln’s nameplate rating, which a standard household circuit may not supply.
Ventilation matters as much as clearance. Kilns release fumes and heat during firing, so the room needs adequate ventilation.
Finally, check the paperwork before installation. NFPA fire safety codes set the reference point for fire clearance, and your local building department can confirm permit and inspection requirements for the circuit and the kiln itself.
Never energize a new kiln circuit until an electrician has verified the breaker size, wire gauge, and grounding against the kiln’s nameplate rating. A mismatch here is the most common cause of kiln-related electrical failures.
Mapping the Clay Path Through Your Zones
Once the wheel, wedging surface, and kiln are placed, walk the clay path in order: store, wedge, throw, dry, trim, bisque fire, glaze, glaze fire. Each step should sit next to the one before it, and no piece should cross the room twice. If the drying shelf is on the far side of the glaze area, greenware will pass through dust on every trip.
Here is the recommended order for placing each element when you lay out a pottery studio.
| Step | What to place |
|---|---|
| 1 | Wheel position, with clear space behind it |
| 2 | Wedging surface within one step of the wheel |
| 3 | Tool cart or small table at throwing side |
| 4 | Drying shelf against a wall, out of the walking path |
| 5 | Clay storage near the entrance |
| 6 | Kiln in a reserved corner or separate room |
| 7 | Glazing on the opposite side from dry clay |
Separating Clean and Dusty Work Areas for Safety
Silica dust is the real hazard in a pottery studio, and it comes from dry clay, trimming, and sweeping. The fix is simple: keep wet work and dry work in separate zones, and never dry-sweep clay dust.
- Wipe surfaces with a wet sponge instead of sweeping
- Use a HEPA vacuum rather than a broom
- Keep a sealed bin for dry trimmings and scraps
The CDC guidance on silica exposure is worth reading once. Clean and dusty zones that stay separate keep dust out of your lungs and off your glazed pieces, which also protects your firing results.
Pottery Studio Storage Ideas for Clay, Tools, and Finished Work
The best pottery studio storage ideas follow one rule: store each thing where you use it. Clay lives near wedging, tools live near the wheel, and finished ceramics live near the door so they leave without a detour.
- Clay storage: low, sturdy shelving; keep bags off the floor and label by clay type
- Clay reclaim: a sealed bucket near the wheel for scraps
- Tools: a caddy or compartmented box at your throwing side
A compartmented organizer box can help sort ribs, trimming tools, and sponges so nothing rolls into the reclaim bucket.
Shelving, Mobile Carts, and Casters
Heavy-duty shelving anchors the studio, but mobile shelving and carts on casters make a small space flexible. Large clear storage boxes can help you put that shelving to work for clay, tools, and finished work. Put the wedging table and tool cart on wheels so you can clear the floor for a big project. Bolt the tall shelves to the wall, and load clay on the bottom.
Small Pottery Studio Organization That Actually Works
Small pottery studio organization comes down to going vertical and staying ruthless. A home studio or garage studio can work well if you use wall space and refuse to hoard.
- Stack shelves high and keep heavy items low
- Use wall-mounted racks for tools and bats
- Choose a minimalist setup: one wheel, one wedging surface, one drying shelf
- Fold in a work surface that tucks away when not throwing
What most guides miss is that a small studio fails from clutter, not from lack of space. Clear one surface completely and keep it clear. That single habit changes how the whole room feels.
Budgeting and Equipment Priorities Before You Buy
Studio-setup guides often focus on what to buy. Deciding what to buy first, and when a cheaper option is good enough, matters just as much. That sequencing is where a studio budget either holds together or falls apart. Spend on the wheel and kiln first, and go cheap on storage. For guidance on reliable pottery tools for professional projects, see what to prioritize before you buy.
A Three-Tier Budget Framework
Think of studio spending in three tiers, and fund them in order.
- Tier one, the making core: a reliable wheel that fits your body, and safe kiln access (your own kiln or a shared/community kiln). These are the only purchases that directly determine what you can produce.
- Tier two, the safety and workflow layer: ventilation, a HEPA vacuum, a fitted respirator, sturdy shelving, and a wedging surface. These protect your health and keep the workflow from collapsing.
- Tier three, the convenience layer: matching containers, decorative storage, extra carts, and duplicate tools. Buy these last, and only after the first two tiers are working.
A common pattern is to invert this order, buying attractive storage and gadgets first because they are visible and affordable, then running out of budget for the wheel or the kiln circuit. Resist that. Tier three is often the easiest place to save money, since storage items can be chosen to fit the budget.
What to Buy First, and When to Buy Used
The first purchase decision is the wheel, and the right answer depends on volume.
The second decision is kiln access. If a full-price kiln plus the electrical circuit is out of reach, a shared or community kiln is a legitimate first step, it lets you learn your firing needs before committing to a size and voltage.
If a full-price wheel is out of reach, consider lower-cost options and buy with your priorities in mind.
Fund the wheel and kiln access first, the safety layer second, and the matching containers last. A studio that skips tier two to afford tier three is a studio that will cost more to fix later.
Tracking the Budget as You Build
Keep a simple running list with three columns: item, tier, and whether it is required for your first firing. Anything that is not required for the first firing moves to a later phase. This keeps the studio functional at every stage instead of half-built until the last purchase arrives. Revisit the list after your first month of making, real workflow usually reveals one or two tier-two items you underestimated, most often ventilation and dust control.
Plan Your Studio Setup with Craft Living Artistry
A studio only works when the workflow, zones, and storage all agree with each other, and that is hard to get right on the first try. Craft Living Artistry offers pottery tools, storage, and maker supplies in one place, so you can find what you need for a functional workspace. For current prices or availability, visit the Craft Living Artistry website.
Frequently Asked Questions
How should a pottery studio be laid out?
Arrange your pottery studio around the clay path: wedging, throwing, drying, trimming, glazing, and firing. Place the wheel near clay storage and a water source, keep greenware drying shelves between the wheel and the kiln, and put glazing away from dry clay dust. Separate clean and dusty zones with distance or a physical barrier. The goal is fewer steps and no cross-contamination between clay dust and glaze work.
What zones should a professional pottery studio have?
A working pottery studio needs six zones: clay storage and wedging, a wheel and throwing area, a drying shelf area for greenware, a trimming and finishing bench, a glazing station, and a kiln room. Add a cleanup sink and a tool storage spot. Each zone should connect to the next step in your pottery studio workflow so pieces move forward without backtracking.
How do you organize pottery tools and supplies?
Keep tools where you use them. A wheel-side caddy for ribs, sponges, and needle tools saves constant trips across the room. Store clay in sealed bins at floor level, glazes in labeled buckets on stable shelving, and finished work on padded shelves away from traffic. For pottery studio storage ideas, mobile carts with casters let you roll tools between zones and tuck them away in a small pottery studio organization plan.
How do you keep a pottery studio clean and safe?
Control dust first. Never dry-sweep clay or silica dust; use wet cleanup and a HEPA vacuum instead. Wear an N95 or better respirator when mixing glazes or handling dry materials, and ventilate the kiln room. Keep a dedicated sink for clay cleanup, wipe surfaces while damp, and store clay in sealed containers. These habits protect your lungs and keep your pottery studio workflow running smoothly.






0 Comments