
Last Updated: October 31, 2026
Quick Summary
Seasonal art projects using household materials match everyday items to each time of year, so you need little or no shopping. Egg cartons suit spring, leaves and pinecones suit fall, and paper and cardboard tubes suit winter. Start with glue, scissors, masking tape and paper.
- Spring projects use egg cartons, toilet paper tubes and tissue paper scraps.
- Pinecone bird feeders take about 15 minutes and are high mess, so do them outside or over a tray.
- Paper snowflakes take about 15 minutes and are an easy, low-mess winter project.
- Use washable paint and glue, and keep small pieces away from children under three.
Table of Contents
- Seasonal Art Projects Using Household Materials: Where to Start
- Spring Art Projects Kids Can Make From Recycled Materials
- Summer Art Projects for Hot Days Indoors and Out
- Fall Art Projects Using Leaves, Pinecones and Acorns
- Winter Craft Projects for Snowy Days and Holidays
- Kids Art Projects at Home: Supervision, Safety and Ages
- Turning Your Seasonal Creations Into a Year-Round Art Routine
- Frequently Asked Questions
Seasonal Art Projects Using Household Materials: Where to Start
Seasonal art projects using household materials are one of the easiest ways to keep kids busy, creative and learning all year. You do not need a shopping trip. Most of what you need is already in your recycling bin, junk drawer or backyard. This guide is meant to help parents and teachers start simple and build a routine that fits the calendar.
The core idea is straightforward: match the materials to the season. Spring brings tissue paper and egg cartons. Summer suits paper plates and washable paint. Fall is made for leaves and pinecones. Winter calls for paper snowflakes and cardboard tubes. Working with the seasons keeps projects fresh and gives kids a reason to look forward to each change.
A common mistake is buying a full set of supplies before trying anything. Start with glue, safety scissors, masking tape and paper. Add more only when a project calls for it. Many crafts for kids are successful specifically because they use materials already on hand.
Spring Art Projects Kids Can Make From Recycled Materials
Spring is the best time to turn recycled materials into bright, hands-on art. Egg cartons become flower blossoms. Toilet paper tubes can be painted and stacked into a bird feeder or a colorful spring windsock. Tissue paper scraps can be layered into a rainbow collage on a sheet of cardstock.
Here is a simple project that takes about 30 minutes:
- Cut the cups from an egg carton and paint them in pastel shades.
- Glue the cups onto a paper plate or cardboard base to form a flower.
- Add a green pipe cleaner for the stem.
- Let kids decorate the center with glitter glue or a dot of yellow paint.
Watch out: buttons, beads and small craft pieces can be choking hazards for children under three. Choose larger items for younger kids.
Summer Art Projects for Hot Days Indoors and Out
Summer projects work well outdoors, but they also suit a cool room when the heat builds. Paper plate suncatchers are a favorite. Cut a hole in the center of a paper plate, then let kids color the rim with markers and cover the opening with tissue paper or cellophane. Hang the finished piece in a sunny window so the light shines through.
Sidewalk art with washable paint or sidewalk chalk keeps mess to a minimum. Mix a few drops of food coloring into water and use a spray bottle to create temporary designs on the driveway. Everything washes away with the next rain, which takes the pressure off kids and parents alike.
For indoor days, try bottle cap mosaics. Glue plastic caps onto a cardboard base in patterns, then paint over them for a finished look.
Fall Art Projects Using Leaves, Pinecones and Acorns
Fall is the season of natural materials. Leaves, pinecones and acorns are free, and kids love collecting them. The projects below are organized by time, difficulty and cleanup so you can pick one that fits the afternoon you actually have.
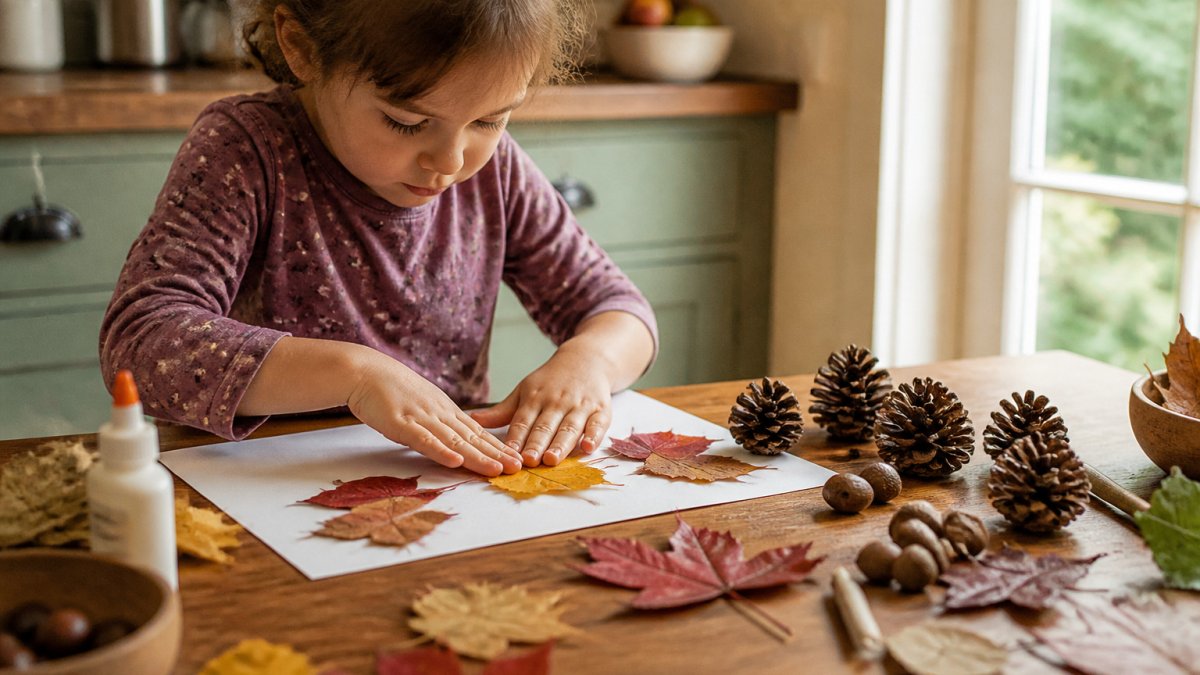
Leaf prints (about 20 minutes, easy, low mess). Brush washable paint onto the veined side of a leaf, press it onto paper, and peel it away. Each print shows the leaf’s shape and texture. Cleanup is a damp paper towel and a quick hand wash.
Pinecone owl (about 30 minutes plus drying, easy, medium mess). Glue two acorn caps and a googly eye to a pinecone to make a small owl. If you do not have googly eyes, cut two small circles from white paper and dot them with a marker. Washable white glue works, but it needs a few hours to set; a low-temperature glue gun speeds this up for adults only.
Pinecone bird feeder (about 15 minutes, easy, high mess). Spread peanut butter on the cone, roll it in birdseed, and hang it from a string. Substitute sunflower seed butter or shortening if peanut allergies are a concern. Do this one outside or over a tray, because birdseed scatters.
Acorn cap mosaic (about 25 minutes, easy, low mess). Glue acorn caps onto a cardboard base in a pattern, then let kids paint the gaps. This is a good use for caps that lost their stems.
Before collecting outdoors, check the area for insects, sharp sticks and poison ivy. Wash leaves and pinecones before bringing them indoors and dry them fully so they do not mold.
Set a 10-minute collection timer. Kids gather more than they can use, and a limit keeps the cleanup manageable.
Acorns and small caps are choking hazards for children under three. Keep them out of reach and choose larger materials for toddlers.
Here is a quick comparison of the four fall projects, with time, difficulty and cleanup for each.
| Project | Time | Difficulty | Cleanup |
|---|---|---|---|
| Leaf prints | About 20 minutes | Easy | Low mess |
| Pinecone owl | About 30 minutes plus drying | Easy | Medium mess |
| Pinecone bird feeder | About 15 minutes | Easy | High mess |
| Acorn cap mosaic | About 25 minutes | Easy | Low mess |
Winter Craft Projects for Snowy Days and Holidays
Winter gives you plenty of indoor time, and paper and cardboard are ideal materials. These projects are labeled with time, difficulty and cleanup so you can match one to the day.
Paper snowflakes (about 15 minutes, easy, low mess). Fold a square sheet of white paper in half several times, cut shapes along the folds, then unfold for a unique design. Substitute coffee filters for paper if you want softer edges, and use blunt-tipped scissors for younger kids. Hang them in a window or string them into a garland. Cleanup is a quick sweep of paper scraps.
Cardboard tube mini tree (about 20 minutes, easy, medium mess). Wrap a toilet paper tube in green construction paper, add a star cut from yellow paper, and decorate with stickers. Several together make a small forest on a shelf. Substitute a paper towel tube cut in half if you have no toilet paper tubes, and use masking tape instead of glue for a faster, less messy build.
Paper plate snowman (about 25 minutes, easy, low mess). Stack three paper plates, glue them together, and add a face and buttons cut from scrap paper. This is a good project for mixed ages because the steps are simple and the pieces are large.
Jar lid ornaments (about 30 minutes, medium, medium mess). Glue a photo or drawing into a metal jar lid, punch a hole, and thread a ribbon. Substitute cardboard circles if you do not have lids. These store flat in a shoebox and last for years.
Keep glue use simple in winter projects. Washable white glue dries clear and holds paper well, and it cleans up easily from clothes and tables.
Pick one project per snowy day and set out only the materials for that project. Fewer choices means less mess and more finished pieces.
Hot glue and sharp tools are for adults only. Supervise any project that uses them, and keep small pieces away from children under three.
Kids Art Projects at Home: Supervision, Safety and Ages
Most household craft projects are safe for children, but age and supervision matter. Preschoolers need close adult help with scissors, glue and small pieces. Children aged six and older can usually handle basic cutting and gluing with adult check-ins. Always supervise any project that uses hot glue, sharp tools or small items.
Check labels on paint, glue and craft supplies. Choose products marked non-toxic and washable where possible, and keep them out of reach of children under three. Scissors should be blunt-tipped for younger children.
Choosing a project by age helps prevent frustration. Simple tasks such as tearing paper, stamping and color mixing suit toddlers. Projects with several steps, like painted pinecone animals, suit older kids. Adjust steps to match each child’s skill level.
Turning Your Seasonal Creations Into a Year-Round Art Routine
A simple routine keeps the habit going all year. Pick one project per month that matches the season, and set aside a shelf or bin for materials you collect. Save egg cartons, cardboard tubes, paper scraps and clean jars. Over time you build a stash that makes each new project easier to start.
Display finished work where kids can see it. A rotating gallery on a hallway wall or a string across a window lets children take pride in their pieces. Photograph the best ones to build a memory book.
Start small, stay consistent, and let the seasons guide what you make next.
Frequently Asked Questions
What are easy seasonal art projects for kids to make at home?
Simple options include leaf rubbings in fall, paper snowflakes in winter, tissue paper flower collages in spring and sun catchers from clear plastic lids in summer. Each needs only paper, scissors, washable glue and a few household items. Choose one season at a time, let children pick the colors and expect the process to matter more than the finished look. Most projects take 20 to 45 minutes, which suits younger children with an adult nearby to help with cutting and drying.
What household materials can kids use for art projects?
Cardboard tubes, egg cartons, paper towel rolls, bottle caps, old magazines, bubble wrap, tissue paper, aluminum foil, yarn scraps and jars all work well. Natural finds such as sticks, stones and dried leaves add texture at no cost. Rinse food containers before use and keep sharp tools and small pieces away from toddlers. Saving these materials in a labeled bin makes it easy to start a project on short notice.
How can you make fall crafts with kids using items from home?
Leaf prints, pinecone bird feeders spread with peanut butter and birdseed, and paper plate autumn wreaths are popular choices. Collect leaves on a walk, flatten them between newspaper under a heavy book for a few days, then use them in collages. Supervise any project involving small seeds or nuts with younger children because of choking risk. Pinecones can be dried indoors for a day or two before crafting to remove moisture.
What spring crafts can kids make with recycled materials?
Egg carton flowers, paper towel roll butterflies and milk jug bird feeders turn everyday trash into spring projects. Clean containers thoroughly, dry them completely and trim any sharp edges with adult scissors before children handle them. Paint with washable tempera and let each layer dry before adding details. These projects work well for mixed ages because the cutting, gluing and decorating steps can be divided among children.



0 Comments