
Table of Contents
- The 7 Essential Beginner Pottery Tools You Need First
- Quick Comparison: Starter Kits vs. Individual Tools
- Kemper Basic Pottery Tool Kit: The All-in-One Starter
- Dolan 220c Fettling Knife: Precision Cutting and Trimming
- Mudtools Polymer Ribs: Shaping and Smoothing
- Essential Pottery Handbuilding Tools for Slab and Coil Work
- How to Set Up a Home Pottery Studio on a Budget
- Understanding the Difference Between Clay Types
- Building Your Kit with Confidence
- Frequently Asked Questions
Last Updated: September 5, 2026
Starting a home pottery studio is an exciting step, but the sheer number of beginner pottery tools available can quickly become overwhelming. Many new potters either buy a massive kit full of pieces they never use or purchase individual tools that don’t cover the basics. The good news is that you only need a focused set of essential items to begin learning handbuilding and wheel-throwing. This guide from Craft Living Artistry walks you through the core beginner pottery tools for home studios, helping you build a functional kit without wasting money on gear you don’t need yet.
Below, we’ll cover the seven tools that form the foundation of any pottery practice, compare starter kits against individual purchases, and explain how to set up a space that supports your new hobby. We will also break down the difference between clay types so you choose the right material for your first projects.
The 7 Essential Beginner Pottery Tools You Need First
A functional starter set for pottery includes seven core tools: a wire cutter, a needle tool, a wooden rib, a metal scraper, a sponge, a loop tool, and a fettling knife. These beginner pottery tools cover the entire workflow, from cutting clay from the bag to trimming a finished piece on the wheel. Each tool serves a specific purpose, and having them all on hand prevents frustrating interruptions during practice sessions.
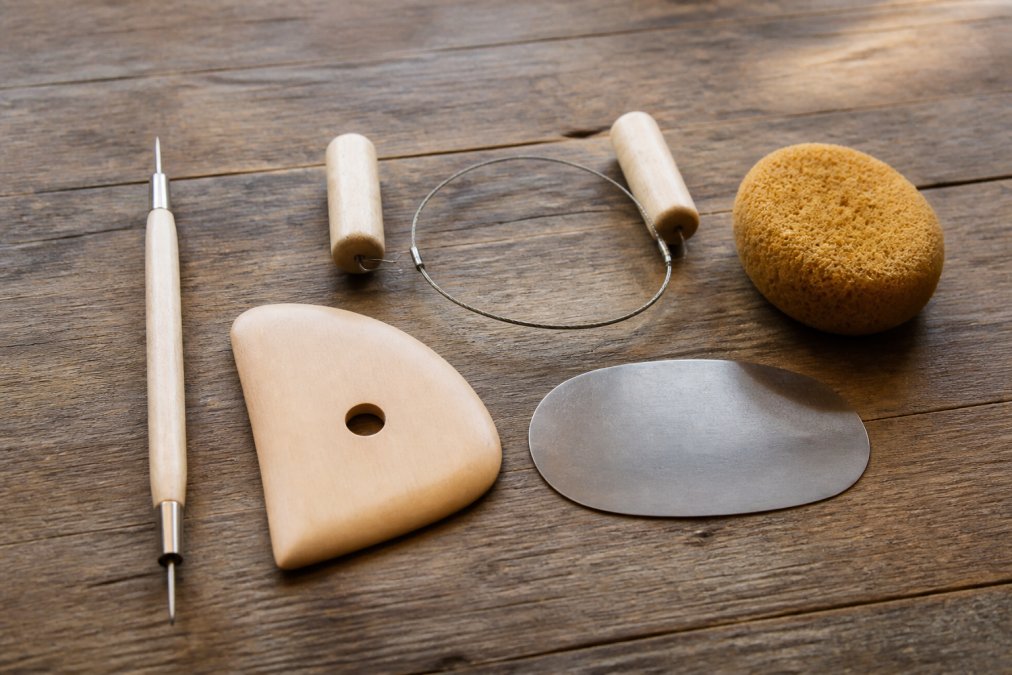
The wire cutter slices through stiff clay blocks and removes finished pots from the wheel head. The needle tool measures wall thickness, scores clay for joining, and trims away small imperfections. A wooden rib shapes and compresses the clay wall during throwing, while a metal scraper cleans the bat and smooths surfaces. A sponge manages water levels inside the pot, and a loop tool trims the foot of the piece. The fettling knife handles precise cutting and trimming tasks that require a sharp edge.
Buy a sponge designed specifically for pottery. Household sponges break down quickly and can leave fibers in your clay, ruining the surface of your work. A high-density synthetic sponge lasts longer and holds water more consistently.
Quick Comparison: Starter Kits vs. Individual Tools
When you are just beginning, the choice between a starter kit and individual tools comes down to budget and commitment level. A kit gives you everything at once, while buying individually lets you prioritize quality on the tools you will use most often.
| Option | Best For | Pros | Cons |
|---|---|---|---|
| Starter Kit | Absolute beginners testing the hobby | All essentials in one purchase, lower upfront cost | Entry-level tools may need replacement |
| Individual Tools | Potters with specific needs | Higher quality per tool, buy only what you need | Higher initial cost, requires research |
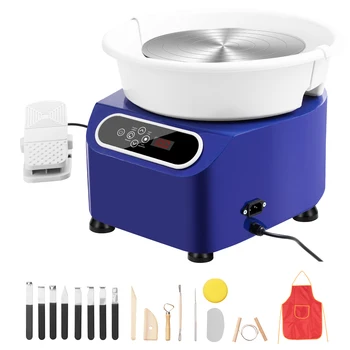
The Kemper Basic Pottery Tool Kit is a solid entry point, including a wire clay cutter, needle tool, wooden rib, metal loop and ribbon tools, a sponge, and a metal scraper. At roughly $30, it provides a comprehensive foundation without a major investment. For those who want professional-grade durability from day one, buying individual tools like the Dolan 220c Fettling Knife or the Mudtools Polymer Ribs offers better performance, though the total cost will be higher.
Kemper Basic Pottery Tool Kit: The All-in-One Starter
The Kemper Basic Pottery Tool Kit is the most straightforward way to begin collecting beginner pottery tools. This set contains all the fundamental implements needed to learn basic throwing and trimming techniques: a wire clay cutter, a needle tool, a wooden rib, metal loop and ribbon tools, a sponge, and a metal scraper. For under $30, it removes the guesswork from assembling a kit piece by piece.
What makes this kit appealing is its convenience. It is widely available at ceramic supply retailers, and the tools cover every step of the pottery process, from wedging to trimming. However, the tools are entry-level, which means they may need replacement sooner if you practice frequently. The metal loop tools can bend if you apply too much force on leather-hard clay, and the wooden rib will wear down over time.
Absolute beginners who want a single, affordable purchase to start learning basic pottery techniques without researching individual tools.
If you decide pottery is a long-term hobby, plan to upgrade the tools you use most often. The kit serves as a perfect starting point, but investing in higher-quality versions of your frequently used tools will improve your experience.
Dolan 220c Fettling Knife: Precision Cutting and Trimming
A fettling knife is one of those beginner pottery tools that you will reach for constantly, and the Dolan 220c is a professional-grade option worth considering. This high-carbon steel knife features a precision-tapered tip that excels at intricate detailing, trimming, and cutting leather-hard clay. The ergonomic handle provides a comfortable grip during extended studio sessions, reducing hand fatigue.
The primary advantage of the Dolan 220c over standard starter kit knives is its superior edge retention. High-carbon steel holds a sharp edge much longer than the softer metal found in budget kits, meaning cleaner cuts with less effort. This makes it ideal for trimming foot rings, cutting slabs, and cleaning up seams on handbuilt pieces.
The main drawback is maintenance. High-carbon steel requires regular care to prevent rust. You will need to wipe the blade dry after each use and occasionally apply a light coat of oil to protect the edge. While this adds a small step to your cleanup routine, the performance difference is significant enough that many potters consider this tool worth the extra care.
Mudtools Polymer Ribs: Shaping and Smoothing
For achieving a professional finish on both wheel-thrown and handbuilt pieces, Mudtools Polymer Ribs are a standout choice among beginner pottery tools. These flexible ribs are made from a non-porous polymer that does not stick to clay or leave behind marks the way wooden ribs sometimes do. They are available in various shapes and flexibility levels, from soft to firm, allowing you to select the right tool for the specific task at hand.
A soft rib is excellent for smoothing and compressing the clay surface, while a firmer rib provides more control for shaping walls and creating crisp curves. The ergonomic shape fits comfortably in the hand, and the material is extremely durable. Unlike wooden ribs, which can crack or warp over time, polymer ribs maintain their shape and performance for years.
The only real challenge is selecting the correct flexibility for your task. If you are unsure, starting with a medium-flexibility rib is a safe choice that handles most shaping and smoothing work effectively. Many potters eventually own several ribs in different flexibilities, but beginners can start with one or two.
Essential Pottery Handbuilding Tools for Slab and Coil Work
While wheel-throwing gets most of the attention, handbuilding is an equally valid entry point into pottery, and essential pottery handbuilding tools differ slightly from throwing tools. If you plan to work with slabs or coils, you will need a few specialized additions to your kit: a rolling pin or slab roller, a rubber rib, a needle tool for scoring, and a fettling knife for cutting clean edges.
The Dirty Girls Slab Bevel Tool is a specialized implement that creates consistent 45-degree angles on clay slabs, which is crucial for clean joinery in box-making and other slab construction. It retails for around $25 and features adjustable angle settings for various slab thicknesses. This tool ensures perfect miter joints and saves significant time compared to beveling by hand.
For scoring and joining coils or slabs, a needle tool is indispensable. The Sherrill Mudtools Needle Tool features a stainless steel point and a textured, non-slip handle, priced around $10. Scoring creates a rough texture on the clay surface, and when combined with slip, it creates a strong bond between pieces. A rubber rib helps smooth and blend the joints after you press the pieces together.
How to Set Up a Home Pottery Studio on a Budget
Setting up a home pottery studio on a budget is achievable if you prioritize space, safety, and the right equipment. You do not need a dedicated room with expensive cabinetry. A garage corner, a basement area, or even a well-protected patio can serve as your studio, provided you address three key concerns: water access, ventilation, and dust control.
First, you need access to water and a way to contain clay sediment. A clay trap or settling tank prevents clay particles from clogging your plumbing. Many beginners use a simple bucket system: let the water sit, pour off the clear top layer, and let the sediment dry before disposing of it in the trash. Never pour clay water down the drain without a trap, as it will eventually cause blockages.
Second, ventilation is critical, especially if you plan to mix glazes or work with materials that generate dust. OSHA’s guidance on respirable crystalline silica outlines the health risks associated with inhaling clay dust, which can lead to serious respiratory conditions over time. Keep your studio well-ventilated, wet-clean surfaces instead of sweeping dry dust, and consider a basic HEPA air filter.
Third, focus on ergonomics to prevent injury. Pottery involves repetitive motions that can strain your wrists, back, and shoulders. A banding wheel, like the Nidec Shimpo 12-inch model, raises your work to a comfortable height and allows smooth rotation without bending over awkwardly. The price is around $120, but the durability and smooth rotation make it a worthwhile investment for frequent use.
Do not sand or scrape dry clay without respiratory protection. The fine silica dust created during dry finishing can damage your lungs over time. Always wet-clean your studio surfaces and use a mask rated for particulate filtration when sanding.
Understanding the Difference Between Clay Types
The difference between clay types comes down to firing temperature, color, and texture, and choosing the right one affects both your technique and your finished pieces. For beginners, the most common options are earthenware, stoneware, and porcelain. Each has distinct characteristics that make it suitable for different projects and skill levels.
Earthenware is the most forgiving clay for beginners (ceramics.org). It fires at lower temperatures, typically around cone 04 to 06, and remains porous unless glazed. It is usually brown or terra cotta in color, is easy to shape, and is less expensive than other types. However, because it is porous, it is not food-safe without a proper glaze, and it is less durable for functional ware.
Stoneware is the most popular choice for functional pottery. It fires at higher temperatures, typically around cone 5/6, which makes the clay vitrified and non-porous. Stoneware is durable, chip-resistant, and available in a range of colors from buff to dark brown. It is slightly stiffer than earthenware, which can be a challenge for beginners, but it produces pieces that are safe for everyday use once glazed.
Porcelain is the most challenging clay for beginners. It is white, fine-grained, and fires at high temperatures, but it is also less forgiving during throwing and handbuilding. The clay is prone to slumping and requires more skill to handle. However, the finished pieces are beautiful, translucent, and highly valued. Most beginners should start with stoneware and transition to porcelain after developing basic skills.
The American Ceramic Society’s beginner guide to clay bodies offers a deeper look at how different clay bodies behave during firing and glazing. Understanding these differences helps you select materials that match your project goals and skill level.
Building Your Kit with Confidence
Starting your pottery journey requires a modest investment in the right beginner pottery tools for home studios, but you do not need to buy everything at once. A starter kit like the Kemper Basic Pottery Tool Kit gives you a complete foundation for around $30. As you develop your skills and identify your preferred techniques, you can upgrade individual tools like the Dolan 220c Fettling Knife or add specialized implements like the Dirty Girls Slab Bevel Tool for handbuilding projects.
The key is to start with the essentials, learn proper technique, and expand your collection based on your actual needs. Craft Living Artistry curates a focused selection of pottery tools and supplies, making it easy to find quality equipment for your new studio without the overwhelm of endless options. Whether you are a hobbyist seeking relaxation or a beginner aiming to develop serious skills, having the right tools makes the learning process more enjoyable and productive.
Starting a home pottery studio is an achievable goal, but it requires thoughtful planning around tool selection, studio safety, and material choices. The challenge is knowing which beginner pottery tools to prioritize and how to set up a space that supports your practice safely. Craft Living Artistry offers a curated selection of pottery tools and maker supplies designed to bring your creative ideas to life. Get started with Craft Living Artistry and build a studio that supports your unique artistic journey.
Frequently Asked Questions
What is the best kit for making pottery at home?
The Kemper Basic Pottery Tool Kit is a solid starting point for most beginners. It includes the core items you need to start learning: a wire clay cutter, needle tool, wooden rib, metal loop and ribbon tools, a sponge, and a metal scraper. While individual tools often offer higher quality, a kit gives you a complete set to practice and figure out what you use most before upgrading.
Do I need a kiln to start pottery at home?
You don’t need a kiln on day one. You can practice handbuilding and wheel-throwing without one, but you’ll eventually need access to a kiln to fire your pieces. Many beginners join a local studio or community center that offers kiln services for a fee. This lets you learn and create at home while saving the cost and space a kiln requires.
What is the difference between clay types for beginners?
For beginners, the main choice is between earthenware, stoneware, and porcelain. Earthenware is the most forgiving and fires at lower temperatures, making it ideal for practice. Stoneware is more durable and versatile, firing at mid-range temperatures like cone 5/6. Porcelain is beautiful but less forgiving due to its fine, finicky nature, so it’s often better to wait until you’ve mastered the basics.
How much should I spend on beginner pottery tools?
You can start with a basic kit for around $30, which covers the fundamentals. As you progress, you’ll likely want to invest in higher-quality individual tools like a fettling knife or polymer ribs, which cost between $10 and $25 each. A major purchase like a banding wheel can wait until you’re sure you want to invest more in the hobby.
This article was written using GrandRanker


0 Comments