
Table of Contents
- What You’ll Need Before You Start
- Essential Jewelry Making Tools for Beginners
- Beads and Decorative Materials
- Jewelry Findings for Beginners
- Stringing Materials: Wire, Thread, Cord, and Elastic
- Basic Bracelet Beading Supplies
- How to Start Beading: Your First Steps
- Common Beginner Mistakes to Avoid
- Frequently Asked Questions
Last Updated: October 18, 2026
What You’ll Need Before You Start
Starting a jewelry-making hobby doesn’t require a fortune or a warehouse of jewelry making supplies. Success comes down to the right tools, quality materials, and knowing what each item does.
Most beginners overspend on supplies they’ll never use. Start with essentials, add specialized tools after mastering basic techniques, and choose materials that work well together.
Essential Jewelry Making Tools for Beginners
The right tools make techniques easier, reduce broken materials, and help you finish professional-looking pieces.
Start with four core tools. These handle 90% of beginner projects:
- Round-nose pliers bend wire into loops and curves
- Chain-nose pliers grip, bend, and straighten wire
- Flat-nose pliers hold wire firmly without leaving marks
Don’t buy cheap versions. Poor-quality pliers slip, bend incorrectly, and frustrate you within minutes. Invest in tools with smooth joints and comfortable handles.
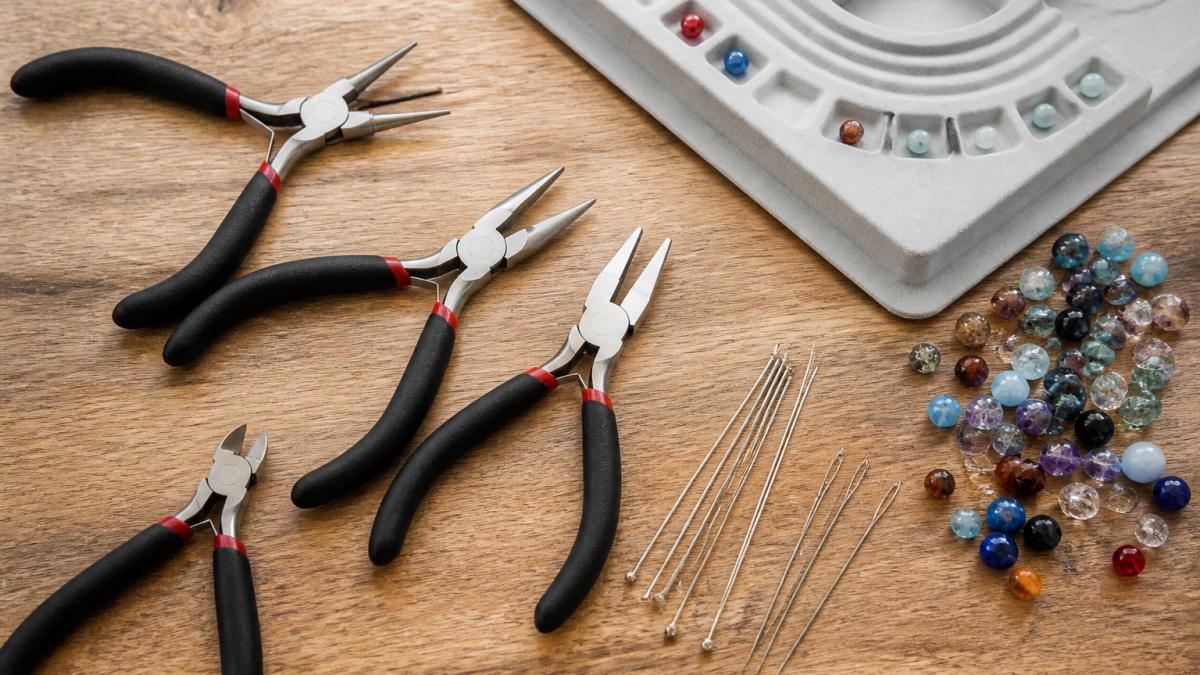
Pliers and Their Uses
Round-nose pliers create loops and spirals. The tapered tip wraps wire into circles to attach beads, make jump rings, and create decorative elements.
Chain-nose pliers are your workhorse for opening jump rings, bending wire, and holding pieces steady.
Flat-nose pliers grip beads, wire, and findings without leaving dents, essential for holding delicate materials.
A common mistake is buying a 10-piece plier set you’ll never touch.
Wire Cutters and Scissors
Wire cutters slice through jewelry wire without crushing it. Dull cutters bend wire instead of cutting cleanly, leaving rough edges that catch on beads and thread.
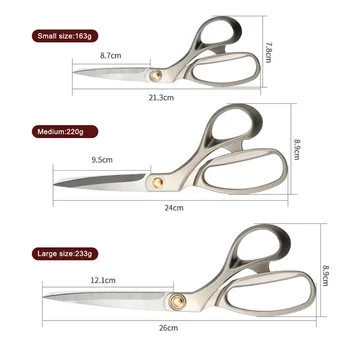
Scissors cut thread, cord, and elastic. Use dedicated craft scissors and keep them sharp, dull blades fray materials.
One pair of each is enough to start. Replace them when they stop cutting smoothly.
Beading Needles and Thread
Beading needles are thin and flexible, slipping through small bead holes without bending or breaking.
Beading thread is stronger than sewing thread, resists fraying, and holds knots securely. Nylon is forgiving and affordable for beginners.
A needle that’s too large won’t fit bead holes; one too small breaks easily. Start with size 10 needles and size 12 thread.
Beads and Decorative Materials
Beads are where your creativity happens, in endless colors, shapes, sizes, and materials.
Seed beads are tiny and uniform. They’re perfect for stringing and weaving.
Metal beads add sophistication. They’re heavier than glass, so use them sparingly in delicate designs.
Wooden beads are lightweight and warm, ideal for casual, bohemian styles.
Start with a beginner bead assortment mixing colors, sizes, and finishes.
Jewelry Findings for Beginners
Findings are the metal parts that hold a piece together, clasps, jump rings, pins, crimps, and ear wires. They’re small and cheap individually, which is why beginners buy the wrong ones: a clasp too small for the cord, or a jump ring too thin for the beads, fails on the first wear.
The fix is to buy findings by size and gauge, matched to the stringing material and the weight of the piece.
Read the Gauge Before You Buy
Wire and findings are measured in gauge, and the numbering runs backward: a lower number is thicker. For beginners:
- Jump rings in 20- or 22-gauge are a common all-purpose size for bracelets and light necklaces. Thinner rings (24-gauge and up) open easily but pull apart under weight; thicker rings hold but are harder to open.
- Head pins and eye pins in 21- to 24-gauge fit most bead holes and bend with hand pliers. Match pin gauge to wire gauge for consistent flex.
- Crimp beads must match cord diameter, a crimp for 0.5 mm cord won’t grip 1 mm cord, and an oversized crimp slides loose.
Keep one gauge in mind as your baseline. If you string with 22-gauge wire, buy 22-gauge jump rings and 22-gauge eye pins. Consistent gauge means consistent strength and fewer mismatched parts.
Clasps: Pick by Ease and Security
- Lobster clasp, the beginner default. One-handed to open, secure when closed, and available in sizes matched to the piece’s weight. Use a larger clasp for necklaces, a smaller one for bracelets.
- Spring ring clasp, smaller and cheaper, but harder to work one-handed. Fine for light bracelets.
- Toggle clasp, a ring and a bar. Easy to fasten, but can slip open on a loose-fitting bracelet.
Jump Rings: Open and Close Them Correctly
A jump ring is a small metal circle with a single cut. To open it, hold each side with pliers and twist the ends apart sideways, never pull it open like a C.
Use two pairs of pliers (chain-nose in each hand) for control. Close the ring the same way, twisting the ends back until they meet with no gap.
Pins: Head Pins vs. Eye Pins
- Head pin, a straight wire with a flat or ball end. String a bead, then form a loop at the open end with round-nose pliers. Use it for dangles and charm drops.
- Eye pin, a straight wire with a closed loop at one end. String a bead, then form a second loop at the other end to link components in a chain.
Both are sold by gauge and length. Buy a length long enough to pass through your bead plus leave about 3/8 inch of wire for the loop.
A Starter Findings Kit That Actually Works
- 10-20 lobster clasps in a size matched to your pieces
- 50 jump rings in 20- or 22-gauge, in one or two diameters
- 20-30 head pins and 20-30 eye pins in a gauge matching your wire
Cheap findings are the most common cause of a piece breaking at the clasp. Look for findings described as tarnish-resistant or plated over a base metal, and avoid unbranded packs with no gauge listed, you cannot match what you cannot measure.
Buy findings in the same gauge as your wire and the same size as your cord, and the small metal parts stop being the weak point of every project.
Stringing Materials: Wire, Thread, Cord, and Elastic
Your stringing material determines how your piece looks and feels.
Nylon cord is durable and comes in many colors for casual necklaces and bracelets.
Silk thread is delicate and beautiful. It’s for advanced projects once you’ve mastered basic techniques.
Start with beading thread and elastic cord. These two handle most beginner designs.
Basic Bracelet Beading Supplies
Bracelets are the most forgiving first project because they need fewer components and simpler connections than necklaces. But “fewer” is not “any”, the supplies have to match each other in size, or the bracelet fails before you finish stringing it.
A working bracelet supply set breaks into four decisions:
- Stringing material, elastic cord, beading thread, or jewelry wire
- Beads sized to that stringing material, hole diameter must clear the cord or wire
- A closure, knot for elastic, clasp and findings for thread or wire
Match the Stringing Material to the Bead Hole
The single most common beginner failure is buying beads whose holes are too small for the cord. Before you buy, check the hole size, not just the bead size.
- Elastic cord for stretch bracelets typically runs about 0.5 mm to 1 mm in diameter. Beads need a hole larger than the cord, roughly 1 mm or wider is a safe starting point for most glass and stone beads.
- Beading thread for knotted or needle-strung bracelets is much thinner, often around 0.2 mm to 0.3 mm, so it passes through seed beads and small-hole stones that elastic cannot.
- Jewelry wire for strung or wire-wrapped bracelets is sold by gauge. For bracelets, 20- or 22-gauge wire is a common beginner range, thick enough to hold shape, thin enough to pass through average bead holes.
Buy one small pack of beads and one spool of cord first, then test the fit before buying more of either. A five-minute test saves a full return.
Measure the Wrist Before You String
Stretch bracelets are sized by the finished inner circumference, not by bead count. A typical adult wrist measures roughly 6 to 7 inches around; a comfortable stretch bracelet is usually built about 0.5 inch larger than the wrist so it slides on without overstretching the cord.
To plan bead count, divide your target circumference by the width of one bead. For example, 7.5 inches of bracelet built from 8 mm beads works out to roughly 24 beads.
The Two Easiest Bracelet Builds
Stretch bracelet (no clasp). String beads on elastic, tie a surgeon’s knot, add a dab of jewelry glue to the knot, and trim. No needle, no findings, no metal.
Thread-strung bracelet (with clasp). Thread a beading needle, string beads, attach a clasp with jump rings or crimp beads, and finish the ends.
Heavy metal or stone beads on thin elastic will stretch and eventually snap. If you want a weighty bracelet, use wire or thread with a clasp instead of elastic.
A Realistic First Bracelet Shopping List
- One spool of elastic cord (about 0.8 mm) or one spool of beading thread
- One pack of beads with holes at least 1 mm wide
- One pair of scissors
That is the entire kit. Everything else, crimping pliers, bead reamers, design boards, can wait until you have finished two or three bracelets and know which step you want to improve.
How to Start Beading: Your First Steps
Your first project should be simple. Success builds confidence. Confidence leads to more ambitious designs.
Organize Your Workspace
Set up a clean, flat surface with good lighting. You’ll lose small beads on cluttered tables.
Gather everything before you start:
- Your tools
- Beads and findings
- Stringing material
- Scissors
A bead mat keeps beads from rolling away, beads stick slightly to its surface, so they stay where you place them.
Keep tools within arm’s reach to avoid wasted time and knocked-over supplies.
Master Basic Techniques
Stringing is the simplest technique. Thread beads onto elastic or thread in a pattern.
Opening and closing jump rings comes next. Hold the ring with two pairs of pliers.
Wire wrapping connects components with decorative loops. Use round-nose pliers to wrap wire around itself.
Start with stringing, master it, then move to jump rings, and finally wire wrapping.
Common Beginner Mistakes to Avoid
Learning what NOT to do saves time and materials.
Buying too much too soon. You’ll accumulate supplies faster than you use them.
Skipping practice with knots. A beautiful bracelet falls apart if the knot fails.
Ignoring storage. Beads in loose piles tangle and get lost.
The jewelry making supplies you choose determine whether crafting feels frustrating or enjoyable.
Start with the essentials, practice basic techniques, and build your collection slowly.
Frequently Asked Questions
What supplies do beginners need to make jewelry?
Beginners need pliers (round-nose, chain-nose, and flat-nose), wire cutters, beading needles, beads, stringing materials like beading wire or thread, and findings such as clasps and jump rings. A bead mat and bead stoppers help organize your workspace. Start with basic supplies and add specialty tools as your skills develop and you explore different techniques like wire wrapping or bead weaving.
How do you get started making jewelry?
Start by gathering essential jewelry making tools and materials, then set up a dedicated workspace with good lighting and a bead mat. Learn basic techniques such as stringing beads on thread or wire, opening and closing jump rings, and attaching clasps. Begin with simple projects like beaded bracelets or necklaces before attempting more complex techniques. Practice with affordable beads and findings until you feel confident.
What basic supplies do you need to make a beaded bracelet?
For basic bracelet beading supplies, you need beads, elastic thread or beading wire, a beading needle (size 10 or 12), scissors, and clasps or crimp beads for securing the ends. A bead mat helps prevent beads from rolling away. If using wire, you’ll also need wire cutters and possibly round-nose pliers for creating loops. These supplies let you create stranded or wrapped bracelets quickly.
Which jewelry-making tools should a beginner buy first?
Prioritize round-nose pliers, chain-nose pliers, wire cutters, and beading needles as your first tools. These handle most beginner techniques. Add a bead mat, bead stoppers, and scissors next. Flat-nose pliers and specialty cutters like snipe-nose pliers can wait until you explore wire wrapping or more advanced techniques. Quality matters: sharp cutters and smooth pliers save frustration and produce better results.
The difference between a hobby that sticks and one you abandon after one project comes down to early success. When your first bracelet looks good and holds together, you want to make another. Craft Living Artistry makes that first success possible by providing quality jewelry making supplies that actually work together. Explore our beginner kits and discover how accessible jewelry making really is.



0 Comments