
Table of Contents
- Crimp Beads vs Tubes: What’s the Difference?
- How to Use Crimp Beads
- How to Use Crimp Tubes
- Crimping Pliers for Jewelry Making
- Crimp Tube Sizes for Beading Wire
- Which One Should You Pick?
- Conclusion
- Frequently Asked Questions
Last Updated: October 15, 2026
Crimp Beads vs Tubes: What’s the Difference?
Crimp beads and crimp tubes both secure beading wire, but they differ in shape and holding power. A crimp bead is a small, hollow, round bead that flattens into a ball when squeezed. A crimp tube is a longer cylindrical finding, and that extra length is exactly what makes it grip harder.
Both findings do the same job at the ends of a necklace or bracelet. They just do it differently, and picking wrong shows up later as a slipped strand or a failed connection.
Here is the practical split most guides skip: beads finish lighter and look softer, while tubes hold heavier pieces together. Below, we break down how each works, which crimping pliers to pair with them, and how to match crimp size to wire diameter so your closures survive daily wear.
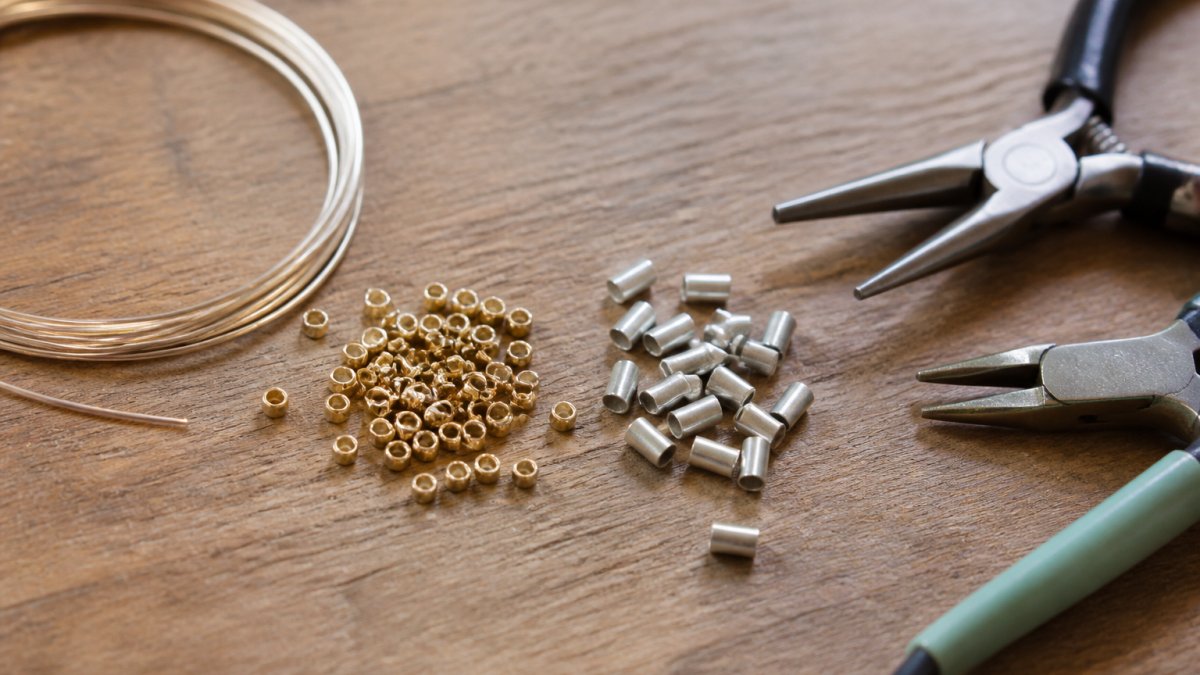
Shape, Construction, and Contact Area
Crimp beads vs tubes come down to geometry. A crimp bead is a hollow, round bead, and a crimp tube is a section of seamless tubing, typically longer than a bead with a similar internal diameter, as described in Fire Mountain Gems’ guide to crimps. That extra tube length translates directly into more metal-to-wire contact, which is why tubes resist slipping better on heavier or multi-strand designs.
| Feature | Crimp Bead | Crimp Tube |
|---|---|---|
| Shape | Hollow, round | Cylindrical, seamless |
| Contact area | Shorter | Longer |
| Best for | Light strands, delicate look | Heavy, multi-strand pieces |
| Finish when crimped | Rounded ball | Flattened fold |
| Common sizes | 2mm, 3mm | 1x1mm to 3x3mm |
The single variable that matters most is contact area. A longer tube grips more wire, so reach for tubes when the piece carries weight or uses multiple strands.
How to Use Crimp Beads
Using a crimp bead takes four steps and about a minute per end. Thread the wire through the bead, pass it back through to form a loop, then compress the bead with crimping pliers until it folds into a secure ball. The round shape flattens into a compact, rounded finish that sits close to the clasp.
- String your beads, then thread the wire tail through the crimp bead.
- Pass the wire back through the bead to create a small loop.
- Slide the bead snug against your last bead, leaving a little slack.
- Seat the bead in the round notch of your crimping pliers and squeeze firmly.
- Tug the wire to confirm the bead holds before trimming the tail.
A common mistake is squeezing too gently on the first pass. A loose crimp looks fine until the strand is worn, then the wire slides free. If the bead does not flatten into a tight ball, discard it and start again. Crimp beads suit lighter bracelets and necklaces where a softer, more delicate look is the goal, a point Beadalon’s comparison video also makes about their lighter weight and appearance.
How to Use Crimp Tubes
Crimp tubes follow a similar sequence but finish differently. Thread the wire through the tube, loop back through, then fold the tube using the groove in your crimping pliers. That groove creates a rounded fold rather than a flat squash, which distributes pressure along the tube’s length.
- Thread the wire through the tube and back through to form your loop.
- Position the tube in the grooved section of your pliers.
- Squeeze to create a rounded fold in the middle of the tube.
- Rotate the tube and squeeze again to close the fold into a tight barrel.
- Test the connection with a firm tug, then trim the tail.
The two-stage fold is what gives tubes their holding strength. Squeezing once leaves the tube partly open; the second squeeze closes it fully. Tubes are the better pick for heavier pieces and multi-strand designs precisely because that longer body grips more wire.
Crimping Pliers for Jewelry Making
Crimping pliers for jewelry making come in two working zones: a round notch that shapes beads into a ball, and a grooved section that folds tubes into a barrel. Using the wrong zone is the fastest way to ruin a crimp. Beads belong in the round notch, tubes in the groove, and mixing them up produces a weak or misshapen connection.
Most crimping pliers are sized to match common crimp sizes, so a tool sized for small crimps will not seat a large tube correctly. If you crimp often, keep one pair for beads and one for tubes to avoid constant readjustment. Beginners can start with a single pair that covers both zones, then add a dedicated tool once a project demands it. Our Artbeads guide to crimp tools and sizes walks through how tool size lines up with crimp size.
Before crimping a finished piece, practice on scrap wire with the same crimp and tool. Ten seconds of testing tells you whether your squeeze is firm enough before you commit a whole strand.
Crimp Tube Sizes for Beading Wire
Crimp tube sizes for beading wire must match your wire diameter, or the connection fails. A tube too large for the wire leaves gaps that let the wire slip; a tube too small will not close around it.
Beading wire is sold by diameter, and crimp tubes are labeled to match. Most beading wire on the market is sold in diameters from about 0.010 in to 0.024 in (roughly 0.25 mm to 0.6 mm), and crimp tubes are labeled with a size that corresponds to that range.
| Beading Wire Diameter | Typical Crimp Size | Crimp Style That Fits | Pliers Zone |
|---|---|---|---|
| 0.010 in (0.25 mm) | 1×1 mm | Crimp bead or short tube | Round notch for bead, groove for tube |
| 0.012 in (0.30 mm) | 1×1 mm to 2×2 mm | Crimp bead or tube | Round notch or groove |
| 0.015 in (0.38 mm) | 2×2 mm | Crimp tube preferred | Groove |
| 0.019 in (0.48 mm) | 2×2 mm to 2×3 mm | Crimp tube | Groove |
| 0.024 in (0.60 mm) | 3×3 mm | Crimp tube | Groove |
Treat the chart as a starting point, not a guarantee. Wire coatings vary in thickness, and a crimp that fits one brand’s 0.015 in wire may feel loose on another’s. The reliable test is mechanical: thread the wire through the crimp, then slide the crimp along the wire. It should move with light resistance and not rattle.
Two methods dominate for closing the crimp once it is sized correctly: the folding crimp, where the tube is folded and closed in two squeezes, and the simpler flatten, where the tube is compressed flat.
- Match crimp internal diameter to wire diameter first.
- Size the crimp’s outer diameter to your bead holes second, a crimp that fits the wire but not the bead hole will not seat.
- Use longer tubes for heavier wire and multi-strand work.
- Keep a sizing card or labeled tray so you grab the right crimp fast.
- Confirm your pliers’ groove is sized for the crimp you chose; a groove too wide will not fold the tube closed.
Skipping the size match is the number one cause of failed connections. A crimp that is one size off may hold for a week, then let go mid-wear, and the piece is usually lost before you notice.
The compatibility chart answers the question most guides leave open: which crimp fits which wire and which tool. Size the crimp to the wire first, the bead hole second, and the pliers groove third, in that order.
Which One Should You Pick?
Pick crimp tubes for strength and crimp beads for a lighter, softer finish.
That is the short answer. The longer answer is that the right choice depends on four variables working together: wire diameter, strand count, wear frequency, and the finish you want at the clasp.
Wire diameter. Thin wire (0.010 in to 0.012 in) works with either a crimp bead or a short tube, because the wire is light enough that a bead’s shorter contact area still grips.
Strand count. A single strand spreads load across one wire, so a bead can handle it if the piece is light.
Wear frequency. A piece worn daily sees repeated flexing at the clasp, and flexing is what works a loose crimp free.
Finish and material. Both crimp beads and tubes come in a range of metals and finishes, and a finish that wears away will expose the base metal underneath.
A quick decision guide:
| Your Project | Best Choice | Why |
|---|---|---|
| Light single-strand bracelet, thin wire | Crimp bead | Shorter contact area is enough for the load |
| Heavy or multi-strand necklace | Crimp tube | Longer body grips more wire and spreads stress |
| Delicate, low-profile look | Crimp bead | Rounded ball finish sits close to the clasp |
| Daily-wear piece | Crimp tube | Two-stage fold resists flex fatigue |
| Beginner first project | Either, sized to wire | Start with the crimp your wire diameter calls for |
| Piece with large bead holes | Crimp tube | Longer body seats better in a wide hole |
Crimp covers are worth knowing about as well. A crimp cover is a small, hollow bead that snaps over a finished crimp to hide it and give a professional finish.
When you are torn between the two, let the wire decide. If your wire is 0.015 in or heavier, start with a tube. If it is thinner and the piece is light, a bead will do the job and look cleaner.
Conclusion
Getting the crimp right is the difference between jewelry that lasts and a strand that comes apart in a drawer. The choice between beads and tubes is really a choice about weight, wear, and the look you want at the clasp.
Craft Living Artistry carries a focused selection of beads, cords, and jewelry-making essentials. Our curated kits bundle the findings, wire, and tools a project needs in one place, which makes sizing simpler for beginners and faster for experienced makers. Whether you are stringing your first bracelet or building a multi-strand piece for daily wear, we have the crimps and pliers to finish it properly.
Get started with Craft Living Artistry and find the crimp beads, tubes, and tools that keep your jewelry together.
Frequently Asked Questions
What is the difference between crimp beads and crimp tubes?
Crimp beads are hollow, round findings that flatten when squeezed, while crimp tubes are seamless cylindrical pieces that fold down the middle. Tubes are longer and make more metal-to-wire contact, which gives them more grip. Beads are shorter and sit more compactly against a clasp. Both secure beading wire into a finished connection, and both come in a range of metals and finishes, so the choice often comes down to how much holding strength and visual bulk you want at the wire end.
Are crimp tubes stronger than crimp beads?
Crimp tubes generally hold better on heavier and multi-strand pieces because the extra length creates more surface contact with the beading wire. That added grip matters most on necklaces and bracelets that see daily wear. Crimp beads still work well for lightweight, single-strand designs. For either type, matching the crimp size to your wire diameter matters more than the shape itself; a loose crimp on the wrong wire size will slip regardless of which form you use.
Can you use crimp beads instead of crimp tubes?
Yes, crimp beads can replace crimp tubes in many projects, especially light single-strand bracelets and necklaces. The trade-off is holding strength. If you are stringing heavier beads, using thicker beading wire, or building a multi-strand design, a tube’s longer fold gives you a more reliable connection. If you swap a bead in for a tube, size it to your wire diameter and check the finished crimp by giving the wire a gentle tug before you trim the tail.
What tool do you use to crimp beads and tubes?
Crimping pliers for jewelry making are the standard tool for both. They have two stations: a rounded groove that folds the crimp into a U shape, and a second station that compresses it into a neat round or oval. Chain-nose pliers can flatten a crimp bead in a pinch, but they leave a sharp, flat edge that can catch on wire and look unfinished. A dedicated crimping tool gives you a smoother fold and a more professional finish on both beads and tubes.
What size crimp tube should I use for my beading wire?
Match the crimp’s inside diameter to your beading wire diameter so the wire passes through twice without binding. Common pairings run from fine wire for delicate strands up to heavier wire for multi-strand work, and crimp tubes are sold in numbered sizes that correspond to those wire gauges. When in doubt, test a crimp on a scrap of the same wire first. If the crimp slides after folding, it is too large; if the wire barely fits through, it is too small.



0 Comments