
Table of Contents
- What Makes Air-Dry Clay Appealing to Beginners
- Air-Dry Clay Pros and Cons: The Complete Breakdown
- Air-Dry Clay vs. Polymer Clay: Which Should You Choose?
- Essential Air-Dry Clay Tools for Beginners
- Best Air-Dry Clay Projects for Beginners
- Common Beginner Mistakes and How to Avoid Them
- The Real Cost and Time Investment
- Is Air-Dry Clay Worth It? The Verdict for You
- Frequently Asked Questions
Last Updated: October 7, 2026
What Makes Air-Dry Clay Appealing to Beginners
Air-dry clay has become a go-to material for people starting their creative journey. You don’t need a kiln, a pottery wheel, or years of experience to make something worth keeping.
The material feels intuitive in your hands: soft, responsive, and forgiving enough that mistakes don’t feel permanent. You can work at your own pace, step away, and come back hours later without the clock ticking on drying time like with traditional clay. For someone who’s never held sculpting tools, that flexibility matters.
But air-dry clay is appealing because it removes barriers, not challenges. You still need to understand how the material behaves, why it cracks, and what projects suit it. Skip those lessons, and you’ll get disappointing results.
Beginners succeed when they choose projects that match the material’s strengths and avoid common pitfalls. That’s the real question underneath “is air dry clay worth it for beginners”: not whether it’s possible, but whether it’s right for your project and expectations.
Air-Dry Clay Pros and Cons: The Complete Breakdown
Real Advantages for New Crafters
The biggest advantage is accessibility. You don’t need studio space, expensive equipment, or a firing schedule. A kitchen table, basic tools, and a few hours are enough to start, removing the mental hurdle of “I don’t have a proper setup.”
The material is also forgiving. If you mess up a section, you can often scrape it away and rework it. If a piece doesn’t turn out, you haven’t lost weeks waiting for a kiln or invested hundreds in equipment, a low-stakes environment that’s valuable when you’re learning what you enjoy making.
Drying without heat also means you can work on multiple pieces at once, with no competing for oven or kiln time. Start one sculpture, set it aside, begin another, a rhythm that suits how many beginners actually work.
The material is also inexpensive to try. Pick up a small amount from most craft retailers and experiment without commitment. If you hate it, you’ve lost minimal money; if you love it, scale up gradually.
Limitations You’ll Face
Here’s what most guides gloss over: air-dry clay is genuinely frustrating for certain projects. It shrinks as it dries, sometimes unevenly, so pieces crack, warp, or split. This is the single biggest reason beginners abandon it.
Texture matters more than you’d expect. Some air-dry clays are sticky and hard to work with, especially if you’re coming from polymer clay. You might feel frustrated and assume you’re doing something wrong, when often you’re just using the wrong clay for your hands and working style.
Durability is another limitation. Air-dry clay is brittle once fully dried: drop a piece from waist height and it might shatter, and moisture can soften or deteriorate it. If you’re making something meant to last years or withstand use, air-dry clay often isn’t the answer.
Drying time is also unpredictable. Thick pieces take days or weeks to dry completely, and if you misjudge thickness, you get a hollow shell outside with a wet center that keeps drying for weeks, cracking as it goes.
Air-Dry Clay vs. Polymer Clay: Which Should You Choose?
The comparison matters because the two materials suit different goals. Air-dry clay is easier to start with: no oven, lower cost, simpler setup. But polymer clay offers more control and durability.
Polymer clay requires baking in a regular home oven, which sounds intimidating but isn’t. Shape it, bake it 15-30 minutes at low temperature, and you’re done.
The tradeoff: polymer clay is stickier initially, especially with warm hands, and costs more per ounce. If you mess up, you can’t simply scrape and rework; you let it cool, then start over or use it as a base.
For jewelry, detailed miniatures, or anything you plan to paint and keep long-term, polymer clay often makes more sense.
Creative Paperclay sits between the two: an air-dry clay some beginners find easier to manipulate, though preference varies. DAS Air-Hardening Modelling Clay is another option, though some beginners find it frustrating compared to alternatives.
The real difference comes down to what you’re making and how much time you want to invest in material-specific techniques.
Essential Air-Dry Clay Tools for Beginners
Must-Have Tools and Optional Additions
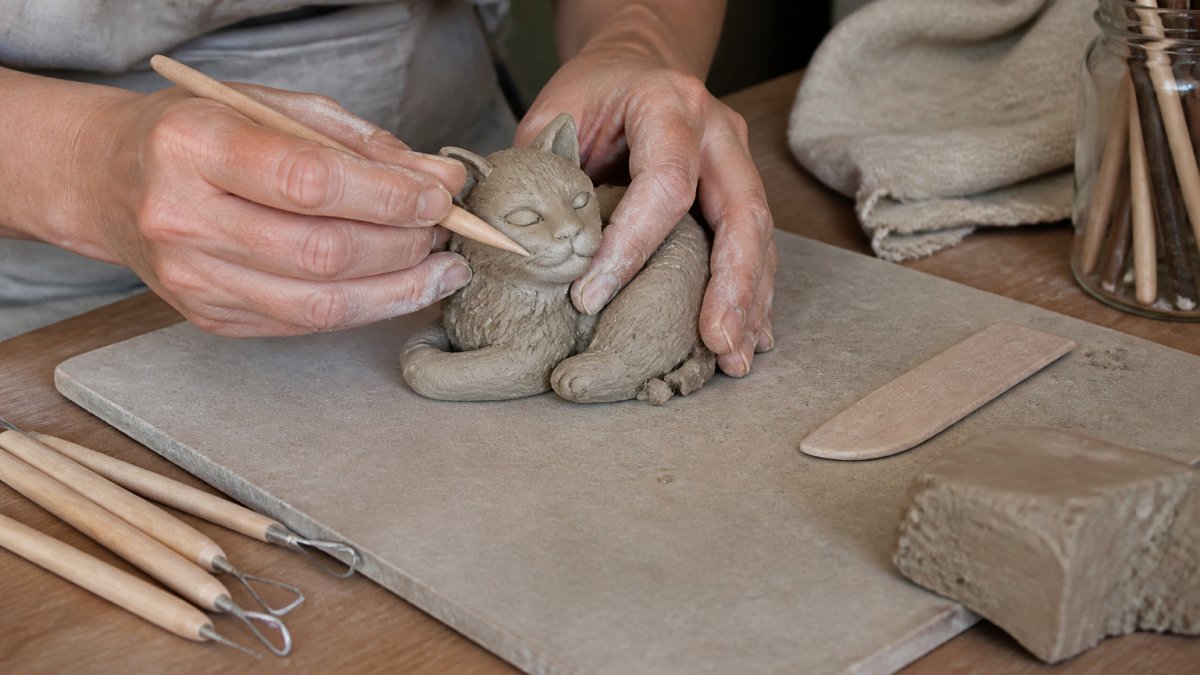
You don’t need much to start. Your hands are your primary tool, air-dry clay is designed to be hand-moldable.
A sculpting tool set (usually under $15) gives you precision. These tools let you add texture, carve details, and smooth surfaces in ways your fingers can’t.
A work surface matters more than you’d think. Use a ceramic tile, cutting board, or canvas board, something that won’t absorb moisture unevenly.
A spray bottle for keeping your hands slightly damp prevents the clay from sticking and tearing. This is genuinely useful and costs nothing if you have one around the house.
Optional but helpful: a clay conditioning machine (like a pasta maker) for stiffer clays, which speeds softening and saves your hands.
Sealants and paints come later. Acrylic paint works fine on air-dry clay, and a clear sealant (water-based polyurethane or acrylic spray) adds water resistance and protects painted finishes.
Best Air-Dry Clay Projects for Beginners
Start with projects that play to air-dry clay’s strengths: small scale, solid forms, and pieces that don’t need to hold weight or withstand moisture.
Small ornaments are ideal first projects. A simple ball, pinched into shape, painted, and hung. These teach you how the material feels, how fast it dries, and whether you enjoy the process.
Miniature figurines work well too. Keeping them small (2-4 inches) means faster drying and less cracking, and you learn proportion, detail work, and how to attach pieces using slip (a paste of clay and water).
Wall masks or decorative plaques suit air-dry clay because they’re flat and dry evenly, and hanging protects them from impact and moisture.
Jewelry like brooches or pendants works if kept simple and solid. Avoid hollow forms or thin sections, which crack easily.
What doesn’t work: functional pieces like bowls or cups meant to hold things, which crack, warp, and deteriorate with moisture. Pieces hanging from thin attachment points often break under their own weight as they dry.
Realistic Durability and Water Resistance
Air-dry clay pieces last years indoors, away from moisture and impact. A painted, sealed ornament on a shelf is fine indefinitely, and a decorative brooch worn occasionally gives good use.
But moisture and use change the equation. A piece bumped regularly, exposed to humidity, or handled frequently deteriorates faster: the material softens when wet and becomes brittle as it dries, a cycle that eventually causes cracks and breaks.
Water resistance depends on sealing. A clear acrylic sealant helps, but it’s water-resistant, not waterproof, a meaningful difference. A sealed piece handles a splash or brief moisture, but won’t survive a humid bathroom or being soaked.
If durability matters, a gift meant to last decades, something a child will play with, a piece exposed to weather, air-dry clay is the wrong choice. Polymer clay or kiln-fired traditional clay will serve you better.
Common Beginner Mistakes and How to Avoid Them
The most common mistake is making pieces too thick. Beginners bulk up their work thinking more material equals more strength, but thick pieces dry unevenly, crack from the inside out, and take weeks to set.
Another frequent error is joining pieces without proper adhesion. You can’t just press two pieces together and expect them to bond.
Underestimating drying time is also common. Beginners assume a piece is dry when it’s only surface-dry, then paint or handle it, and cracks appear days later as the interior keeps drying. Plan for 3-7 days depending on thickness and resist rushing.
Choosing the wrong clay for your hands is another pitfall. Some air-dry clays are noticeably stickier or stiffer. Crayola Air-Dry Clay is affordable but tends to crack more and is less forgiving.
Finally, beginners often skip sealing and painting, then wonder why a piece looks unfinished or deteriorates quickly. Acrylic paint and a clear sealant are inexpensive and transform a raw piece into something intentional and longer-lasting.
The Real Cost and Time Investment
Air-dry clay itself is inexpensive: a small amount costs a few dollars, and a basic tool set runs $10-20. If you already have paint and a spray bottle, startup cost is minimal.
But time catches beginners off guard. A single piece might take 30 minutes to sculpt but a week to fully dry. If you need immediate gratification, that’s frustrating: you can’t move on, paint, seal, or gift it until it’s completely dry.
The hands-on work is quick: most beginner projects take 30-60 minutes to sculpt, and drying happens passively. But psychologically it feels slow, since you finish the fun part and then wait.
Compared to polymer clay, the equation shifts. Polymer clay takes less total time because baking sets it in 15-30 minutes, so you can paint and seal it the same day. A polymer clay project might be 2-3 hours start to finish; an air-dry clay project is 30 minutes of work plus a week of waiting.
Is Air-Dry Clay Worth It? The Verdict for You
Is air dry clay worth it for beginners? Yes, if you understand what it’s good for and accept its limitations.
Air-dry clay is worth it if you’re making small decorative pieces, learning basic sculpting, or want a low-cost entry into clay work.
Air-dry clay is not worth it if you need finished pieces quickly, are making functional items, or need durability. It’s not right if you’re easily frustrated by cracking and shrinkage, or want pieces that withstand regular use or moisture.
The honest middle ground: try air-dry clay with a small, inexpensive project. Spend $10-15 on clay and basic tools, make a simple ornament or figurine, and see how the material feels and whether you enjoy the process.
If air-dry clay suits your goals, Craft Living Artistry offers thoughtfully curated kits with the essential tools and materials you need.
The real worth of air-dry clay isn’t in the material itself, but in whether it matches your expectations and project. Start small, learn its behavior, and decide from there.
Frequently Asked Questions
What are the main downsides of using air-dry clay?
Air-dry clay cracks and shrinks as it dries, especially in thicker pieces. It’s also brittle once hardened and doesn’t hold fine detail as well as other clays. Water resistance is limited, sealing helps but doesn’t guarantee durability outdoors. Drying times are long (24-48 hours or more), and the material can be sticky and harder to smooth than polymer clay.
Is air-dry clay easier to use than polymer clay?
Air-dry clay is generally easier for beginners because it doesn’t require oven baking and feels more forgiving when learning basic shaping and sculpting. However, polymer clay offers better workability for fine detail and smoother finishing. Air-dry clay dries while you work, which can be frustrating; polymer clay stays malleable until you bake it. Choose air-dry if you want a faster setup, polymer if you want more control.
How long does air-dry clay take to dry completely?
Most air-dry clay takes 24-48 hours to dry fully, depending on thickness and humidity. Thin pieces may set in 12-24 hours, while thick sculptures can take 3-5 days or longer. Drying time increases in humid conditions and decreases with air exposure and lower humidity. Plan your projects with this timeline in mind, it’s longer than many beginners expect.
Can you make air-dry clay waterproof?
Sealing air-dry clay with acrylic varnish or waterproof sealant improves water resistance, but it doesn’t make it truly waterproof. Sealed pieces can handle light moisture and indoor humidity, but outdoor use or prolonged water exposure will eventually damage them. For durable, waterproof pieces, polymer clay or traditional kiln-fired clay is more reliable.
What’s the best air-dry clay for a complete beginner?
Crayola Air-Dry Clay and Creative Paperclay are popular beginner choices. Crayola is the most affordable for experimenting with basic sculpting and shaping. Creative Paperclay is slightly easier to manipulate and smoother to finish. Start with a small amount of whichever fits your budget, test the feel and workability, then decide if you want to invest in larger quantities or explore other clay types.
Air-dry clay removes barriers to starting, but it doesn’t remove the need to understand the material. If you’re ready to explore sculpting and don’t need industrial durability, it’s a genuine option. Get started with a curated beginner kit from Craft Living Artistry and experience firsthand whether air-dry clay aligns with your creative goals.


0 Comments