
Table of Contents
- Why Nylon Cord Works So Well for Macramé Jewelry
- The Best Cord for Macramé Jewelry: What to Look For
- Nylon Cord Size for Macramé Jewelry: A Practical Guide
- Nylon vs Cotton Cord for Jewelry Making: Side-by-Side
- How to Finish Nylon Cord Jewelry Neatly and Safely
- Choosing Cord for Bracelets and Necklaces: A Beginner Walkthrough
- Frequently Asked Questions
Last Updated: October 17, 2026
Why Nylon Cord Works So Well for Macramé Jewelry
Nylon cord is the workhorse of macramé jewelry because of grip. Its slight surface texture lets knots lock in place instead of sliding loose, which is why so many makers choose it over softer craft cords.
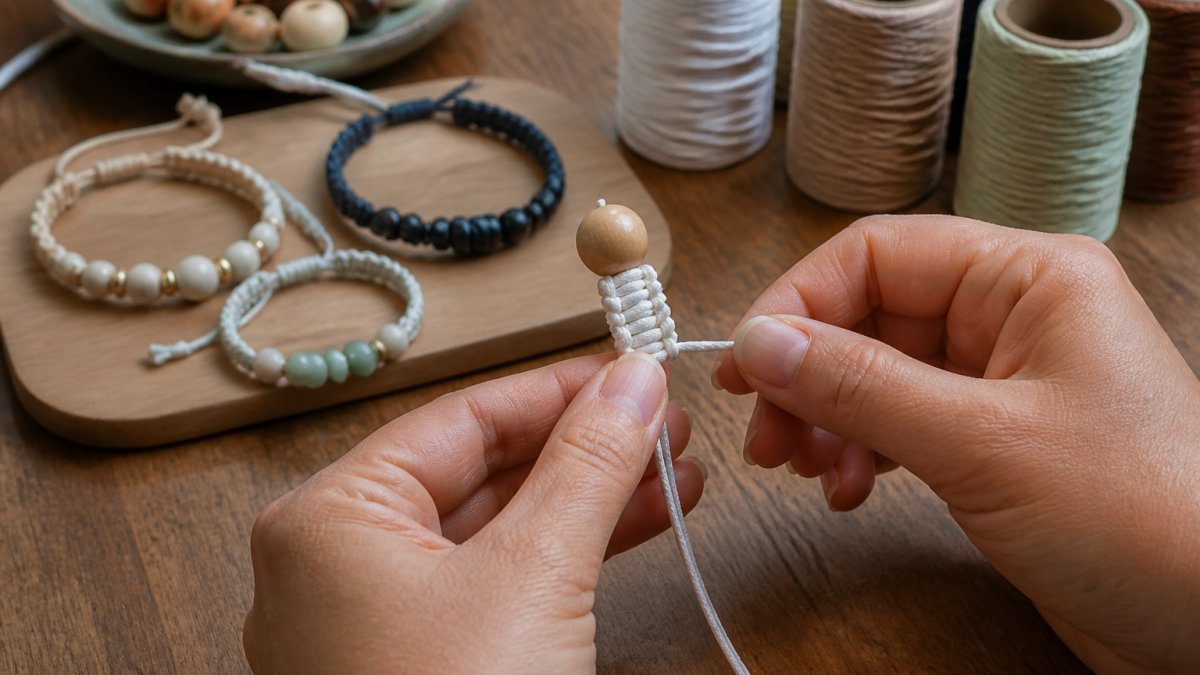
Below, we’ll show why nylon earns its place, how to size it, and how to finish it cleanly.
Most guides treat nylon as just “another cord option.” It isn’t, it behaves differently at every stage: knotting, tightening, trimming, and wearing.
Knot Grip and Knot Security
Knot grip is the friction a cord creates against itself when you pull a knot tight. Nylon’s braided surface creates more friction than smooth cotton or silky polyester, so knots stay put through daily wear.
A common mistake is choosing a cord for how it feels in the hand, then watching every square knot loosen by day’s end. Grip beats softness when a piece must survive real use.
Flexibility, Softness, and Finish
Thin nylon cord bends easily, which matters when working small. Micro-macramé relies on tight, tiny knots, and a stiff cord fights you the whole way.
Nylon also has a subtle sheen that reads as polished rather than rustic, suiting bracelets and necklaces better than heavy craft twine. The trade-off: very smooth nylon can feel slick, so choose a braided or lightly textured version for extra hold.
The Best Cord for Macramé Jewelry: What to Look For
The best cord for macramé jewelry balances three things: grip, size, and finish. Get them right and the project falls into place; get them wrong and you’ll fight loose knots and frayed ends all afternoon.
When you’re comparing options, check these first:
- Knot grip: Does the surface hold a knot or let it slide?
- Thickness: Does the size match the beads and knot style?
- Fray resistance: Does the end stay tidy after you trim it?
- Finish: Matte, satin, or shiny, and does it suit the design?
Nylon Cord Characteristics and Uses
Nylon cord characteristics worth knowing: it’s strong for its thickness, resists stretching better than cotton, and holds color well. It comes braided, twisted, and bonded (with fused ends).
Uses go beyond jewelry: keychains, bag straps, plant hangers, and decorative details. For jewelry, it shines in bracelets, necklaces, and small hanging accents.
Micro-Macramé Materials
Micro-macramé is small-scale knotting, usually with cord around 0.8 mm to 1 mm. At that size, construction matters: a loosely braided cord frays at the tip, while a tight braid stays workable.
Pair thin nylon with small beads and fine findings, keep tension even, and trim ends as you go.
Nylon Cord Size for Macramé Jewelry: A Practical Guide
Nylon cord size for macramé jewelry usually falls between 0.5 mm and 2 mm. Thin cord suits delicate work; thicker cord suits statement pieces and heavier knots.
Here’s a quick reference to guide your choice:
| Cord Size | Best For | Knot Styles | Bead Fit |
|---|---|---|---|
| 0.5-0.8 mm | Micro-macramé, fine bracelets | Spiral knot, half hitch | Small seed beads |
| 1 mm | Everyday bracelets, necklaces | Square knot, spiral knot | Most standard beads |
| 1.5 mm | Statement necklaces, chunky cuffs | Square knot, lark’s head | Medium to large beads |
| 2 mm | Bag straps, heavy pendants | Lark’s head, wrapping | Large-hole beads |
A good rule: the cord should pass through your bead hole twice with a little room to spare. If it barely fits, size down.
Cut your cord longer than you think you need. Knotting eats length fast, and running short mid-project means starting over. For a bracelet, many makers cut roughly four to five times the finished length per working strand.
Nylon vs Cotton Cord for Jewelry Making: Side-by-Side
Nylon vs cotton cord for jewelry making comes down to hold versus feel. Nylon grips better and resists stretching; cotton feels softer and dyes more naturally but loosens over time. Neither is “wrong”, the fastest way to choose is comparing the traits that matter.
The Five Traits That Decide the Choice
Judge every cord on the same five traits: knot hold, feel against skin, durability, finish quality, and suitable projects. Here’s how the main options stack up.
| Cord Type | Knot Hold | Feel | Durability | Finish | Best For |
|---|---|---|---|---|---|
| Nylon | Strong, textured surface grips | Firm, slightly slick | High, resists stretch and abrasion | Subtle sheen, polished | Bracelets, necklaces, micro-macramé |
| Polyester | Moderate, smooth surface can slip | Silky, smooth | High, resists fraying | Shiny, satin-like | Decorative pieces, bag straps |
| Cotton | Moderate to weak, soft fibers compress | Soft, natural | Moderate, stretches and frays | Matte, rustic | Soft rustic pieces, children’s projects |
| Waxed cord | Strong, wax adds friction | Firm, slightly tacky | High, wax protects fibers | Clean, low-fray ends | Closure knots, high-wear points |
What Each Trait Means in Practice
Feel against skin. Cotton wins on softness and suits children or anyone sensitive to texture.
Durability. Nylon and polyester resist stretching and abrasion well. Cotton stretches under load and frays at trimmed ends.
Finish quality. Nylon’s subtle sheen reads as polished and suits bracelets and necklaces.
Suitable projects. Nylon is the all-around choice for jewelry that must keep its shape.
How to Mix Cords Without Ruining Tension
Mixing cord types is possible but risky: a slick polyester strand next to grippy nylon can throw off tension, and knots may pull unevenly. Test a small sample knot first, and keep mixed strands in separate sections rather than alternating them in the same knot pattern.
Don’t mix cord types in one piece without testing first. A slick polyester strand next to a grippy nylon strand can throw off your tension, and the knots may pull unevenly over time.
A Quick Decision Rule
- Choose nylon when the piece must hold its shape through daily wear.
- Choose cotton when softness and a natural look matter most.
- Choose polyester when shine and durability outweigh knot security.
- Choose waxed cord for closure knots and stress points, not as the main cord.
There is no single best cord, only the best cord for the knot, the bead, and the wearer. Judge every option on the same five traits, and the choice becomes obvious.
How to Finish Nylon Cord Jewelry Neatly and Safely
Finishing is where nylon cord jewelry succeeds or fails. A beautifully knotted bracelet with a frayed, bulky, or scratchy end looks amateur and wears out fast. Nylon can be fused, but fusing is only one of several methods, and not always the right one.
The Four Finishing Methods and When to Use Each
**1.
2. Knot cover or bead cap. Slide a small bead, crimp cover, or knot cover over the finished knot and secure it.
3. Glue dot (for makers who avoid flame). A tiny drop of fabric glue or jewelry adhesive on the trimmed end, pressed flat and cured, holds nylon fibers without heat.
4. Whip finish or overhand wrap. For a fully flame-free, glue-free finish, wrap the tail around the last knot two or three times and tie a tight overhand knot, then trim.
Step-by-Step: The Controlled Melt
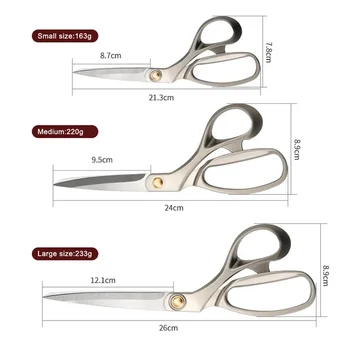
- Trim the end close to the knot with sharp scissors, dull blades crush nylon fibers and cause fraying.
- Hold the tip away from the piece and briefly touch it with a lighter’s heat. Do not hold the flame steady on the cord; a quick pass is enough.
- Let the softened end cool for a second, then press it flat against a heat-safe surface such as a ceramic tile or metal spoon.
- Check that the fused tip sits snug against the knot and does not protrude.
- Repeat for each loose end, working one at a time so you do not accidentally melt a neighboring strand.
Safety matters here. Keep the flame away from your fingers, work over a non-flammable surface, and keep a small dish of water nearby. Never melt cord near children or pets. Nylon melts quickly and can drip; work over a tray to catch any residue.
Fraying, Stretching, and Long-Term Care
Low-fray cord still needs care. To keep a piece looking new:
- Avoid soaking nylon jewelry; spot clean with a damp cloth and mild soap.
- Store pieces flat so knots do not compress and distort.
- Keep pieces away from harsh heat, which can soften the cord and loosen knots.
- Re-tighten any loosened knots gently with a blunt tool such as a tapestry needle.
Nylon resists stretching better than cotton, but heavy pendants can still pull a necklace out of shape. Add a small knot or bead stop where the pendant meets the cord and where the clasp attaches. For daily-wear bracelets, add a knot cover on the closure, the highest-wear point.
A Quick Finishing Checklist
- Trim with sharp scissors, not dull blades.
- Choose a method based on skin contact and skill level.
- Fuse or glue one end at a time.
- Press fused tips flat so they do not scratch.
- Add a knot cover at high-wear points.
The finish is not an afterthought, it is what separates a handmade piece from a homemade one. Match the method to the wearer: melt for speed, knot covers for comfort, glue for safety.
Choosing Cord for Bracelets and Necklaces: A Beginner Walkthrough
Choosing cord for bracelets and necklaces gets easier in order: pick the piece, then the knot style, then the cord. That sequence prevents the most common beginner mistake, buying cord before knowing what it has to do.
Try this simple checklist:
- Decide the piece: bracelet, necklace, or accent.
- Pick the main knot: square, spiral, or lark’s head.
- Match cord size to bead holes.
- Choose nylon for grip, or cotton for softness.
- Cut extra length and test a small sample knot.
For a first project, start with 1 mm nylon cord and a simple square knot bracelet. It teaches tension and finishing without a steep learning curve.
The cord should serve the knot, not the other way around. If your knots slip, size up or switch to a grippier cord before you blame your technique.
Frequently Asked Questions
What size nylon cord should I use for macramé jewelry?
For most macramé jewelry, 0.8 mm to 1 mm nylon cord is the sweet spot. Use 0.8 mm for delicate bracelets, small beads, and micro-macramé designs where fine detail matters. Step up to 1 mm for necklaces, tassels, and knots that need more structure and grip. Thicker cord can overwhelm small beads and make tight knots harder to pull. If you are new to a pattern, test a short sample first to check how the cord behaves with your chosen beads before committing to a full piece.
Is nylon cord better than cotton cord for macramé bracelets?
It depends on the look and wear you want. Nylon holds knots firmly, resists fraying, and keeps a smooth, slightly shiny finish that suits jewelry worn daily. Cotton is softer and has a matte, natural look, but it stretches over time and can fuzz with repeated knotting. For bracelets that need to keep their shape and survive showers and handling, nylon is usually the more durable pick. Cotton works well for decorative pieces that stay dry and are not handled often.
Does nylon cord fray or stretch in jewelry making?
Nylon cord has low fraying compared to cotton, especially when you finish ends with a knot and a small drop of jewelry glue or a careful melt. It does have some stretch, so knot tension matters: pull firmly and consistently, and let the piece rest before trimming. Braided nylon thread and rat-tail cord resist stretching better than single-strand options. Store finished jewelry flat and avoid hanging heavy pieces for long periods, which can gradually lengthen the cord.
How do you finish nylon cord ends neatly on jewelry?
Trim the cord close to the last knot, then secure it. For most nylon cord, a tiny drop of jewelry glue on the knot works well and keeps the finish smooth against skin. If the cord is meltable, carefully touch the trimmed end with a lighter to seal it, keeping the flame away from beads and finished knots. Hide ends under a bead or a wrapped section where possible. Always test your finishing method on scrap cord first so you do not scorch or discolor the piece.
Macramé jewelry rewards good materials, and nylon cord gives you the grip, strength, and finish that small knots demand. If you’re ready to start, Craft Living Artistry curates cords, beads, and maker tools in one place, with a focused selection so you can skip the endless scrolling. Explore our jewelry-making essentials to find the right cord for your next bracelet or necklace, and let your first project set the tone for the rest.



0 Comments