
Last Updated: November 7, 2026
Quick Summary
Sticky UV resin usually means the piece is underexposed, too thick, pigmented too darkly, or not clean. Press the piece to tell surface tack from a soft interior, then recure close to the lamp after cleaning the surface. A soft interior needs thinner layers, not more time.
- Press a clean, gloved fingertip into the center: springing back means only the surface is tacky.
- If the whole piece dents or yields, the interior is undercured and more surface curing will not help.
- Clean the surface with isopropyl alcohol on a lint-free cloth before recuring.
- Place the piece close to the lamp, facing the light, and rotate it to reach shaded sides.
- Rebuild soft pours in thinner layers, since dark pigments and thick pours block UV light.
Table of Contents
- Why Your UV Resin Jewelry Stays Sticky After Curing
- How Long Does UV Resin Take to Cure Under a Lamp?
- Why UV Resin Is Not Curing: Lamp, Light, and Layer Causes
- UV Resin or Two-Part Epoxy: Choosing the Right Resin Type
- How to Fix UV Resin Sticky After Curing
- Resin Jewelry Stuck in Mold: Demolding and Substrate Fixes
- Preventing Tacky Resin Jewelry Next Time, and Handling Uncured Resin Safely
- Frequently Asked Questions
Why Your UV Resin Jewelry Stays Sticky After Curing
Sticky UV resin jewelry is one of the most common frustrations for crafters, and the fix depends entirely on which kind of sticky you have, so identifying the problem first saves time with any sticky UV resin piece. A piece that stays tacky after curing almost always has one of a few causes: too little light, a layer that is too thick, a dark pigment blocking the lamp, or a surface that was never clean to begin with.
Step 1: Identify the resin type
Look at the bottle. UV resin cures only under a UV lamp and typically sets in minutes. Two-part epoxy cures through a chemical reaction after you mix resin and hardener, needs no lamp, and takes hours to a day to reach full hardness. The troubleshooting steps are not interchangeable. Curing epoxy under a lamp does nothing, and measuring UV resin in a two-part ratio is not a thing.
Step 2: Tell surface tack from an uncured interior
This is the distinction most guides skip, and it changes your next move.
- Surface tack is a thin, sticky film on the outside while the piece feels hard underneath. Press a clean, gloved fingertip into the center and near an edge. If the resin resists and springs back, the interior is cured and only the surface layer needs more light.
- Soft interior means the whole piece yields, dents, or feels rubbery throughout. That points to insufficient total cure, an off ratio in epoxy, or a layer too thick for light to penetrate. Additional surface curing will not fix it.
- A tacky spot in one area usually means shading, a bubble, or a contaminated patch. Note where it is relative to how the piece sat in the lamp.
A useful field test: press a clean wooden toothpick into an inconspicuous spot. If it leaves a dent that does not recover, the interior is undercured. If the toothpick slides across a hard surface with only a slight drag, you have surface tack.
Step 3: Match the symptom to the likely cause
- Surface tack on a thin, light-colored piece: almost always underexposure. Go to the lamp and timing checks.
- Surface tack on a dark or metallic piece: pigment is absorbing the light before it reaches the surface layer. Cure in thinner coats or extend exposure.
- Soft interior in a thick pour: light cannot reach the bottom. Rebuild in thinner layers rather than blasting the outside with more time.
Watch out: do not keep adding cure time to a soft-interior piece and assume it will eventually harden. If light cannot reach the uncured resin, more time at the same distance changes nothing.
Once you know which category you are in, the sections below walk through the specific fixes for each.
How Long Does UV Resin Take to Cure Under a Lamp?
Most UV resin cures in a few minutes under a strong UV lamp, but the exact time depends on the resin, the lamp, and the layer thickness. Our guide to how long resin jewelry takes to cure covers timing for different piece types.
Always follow the cure time printed on your resin bottle as your starting point. Then adjust based on what you see. A piece that still feels tacky after the listed time needs more exposure, not less.
A practical approach:
- Start with the time on the bottle for your layer thickness.
- Check the surface with a clean fingertip or a small test spot.
- If tacky, cure in another short session and check again.
Still, watch for yellowing on very clear resin if you cure far beyond the recommended time.
Why UV Resin Is Not Curing: Lamp, Light, and Layer Causes
When UV resin will not harden, light is almost always the missing piece. Resin only cures where UV light reaches it at enough strength, for long enough. Three factors control this: the lamp, the light path, and the layer itself.
UV lamp strength, distance, and placement
A weak or aging lamp may not deliver enough UV energy. Check that your lamp’s wavelength matches what your resin needs. Many UV resins cure best around 365 to 405 nanometers, and the bottle usually lists the range.
Distance matters too. Light weakens the farther it travels, so holding the piece far from the lamp slows curing. Place the piece close to the lamp, and make sure the entire surface faces the light.
Dark pigments and thick pours that block light
Dark or opaque pigments absorb UV light before it reaches the resin underneath. Black, deep blue, and some metallic colors are the usual culprits. A thick pour has the same effect because light cannot penetrate far enough to cure the bottom.
Thin layers and lighter colors cure more reliably. For deep pours or heavily pigmented pieces, cure in thinner stages, letting each layer harden before adding the next.
UV Resin or Two-Part Epoxy: Choosing the Right Resin Type
Choosing the right resin type prevents many sticky results before they start. UV resin and two-part epoxy behave very differently, and mixing up their needs causes confusion.
- Choose UV resin for small jewelry, quick projects, and thin layers. It cures in minutes under a lamp.
- Choose two-part epoxy for thick pours, large pieces, or areas the lamp cannot reach. Our AB epoxy resin kit is designed for high-clarity, professional-quality projects. It cures through chemical reaction rather than light.
Epoxy does not need a UV lamp, but it does need an exact mixing ratio and steady room temperature. Skipping the lamp with UV resin, or measuring epoxy poorly, will leave you with a tacky piece either way.
How to Fix UV Resin Sticky After Curing
If your piece is already tacky, you can often rescue it. Follow these steps in order.
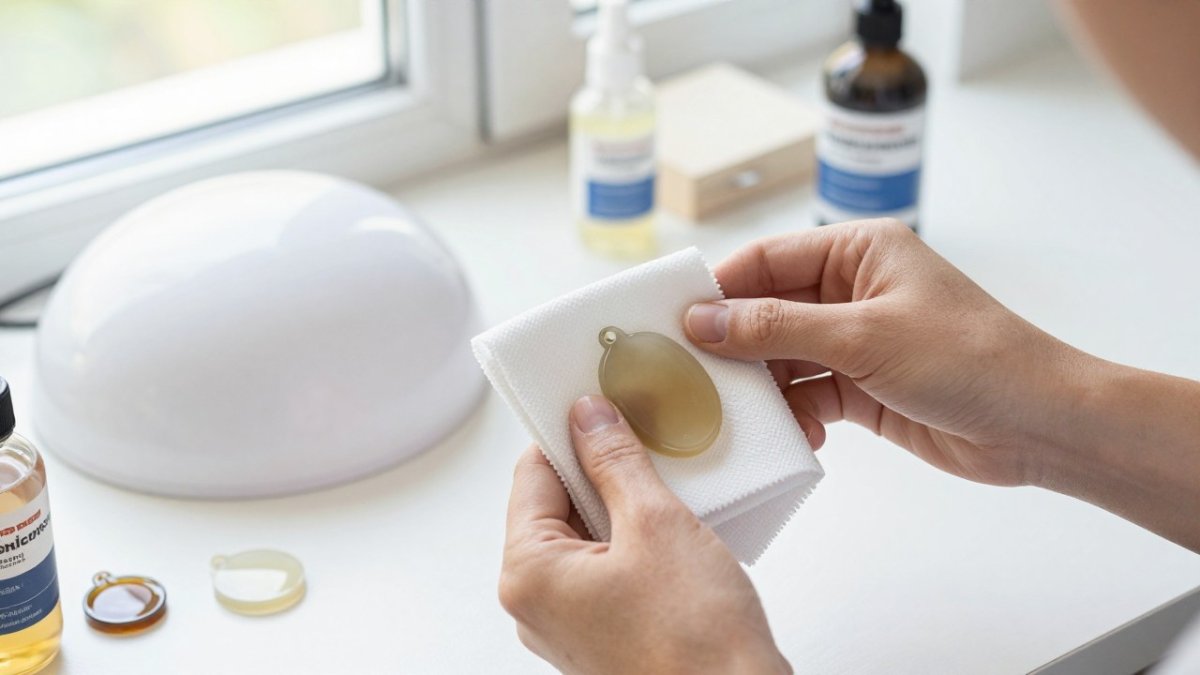
- Clean the surface. Wipe the piece with isopropyl alcohol on a lint-free cloth to remove residue and oils.
- Cure again. Place the piece under the lamp, close and facing the light, for another short session.
- Check the surface. Touch a clean spot. If it still feels tacky, repeat the cure.
- Rotate and retest. Turn the piece to expose shaded areas, then cure again.
- Let it rest. Allow the piece to sit at room temperature for a few hours to finish setting.
Warming the workspace slightly can also help, since warm conditions support better curing.
Watch out: do not use harsh solvents on the resin itself, because they can cloud or soften the finish.
The steps below put the fix in order, so you can work through a tacky piece without skipping ahead.
| Step | What to do | Time or frequency |
|---|---|---|
| Clean the surface | Wipe with isopropyl alcohol on a lint-free cloth | Before recuring |
| Cure again | Place under the lamp, close and facing the light | Another short session |
| Check the surface | Touch a clean spot; repeat cure if still tacky | After each session |
| Rotate and retest | Turn piece to expose shaded areas, then cure | Once per retest |
| Let it rest | Allow to sit at room temperature to finish setting | A few hours |
Resin Jewelry Stuck in Mold: Demolding and Substrate Fixes
Sometimes the piece is hard but stuck in the mold, or the sticky layer is in fact the mold surface. Silicone molds can hold a film of uncured resin if the piece was not fully cured before removal.
To release a stuck piece:
- Cure the piece fully in the mold first, under the lamp.
- Flex the silicone gently to loosen the edges.
- Avoid forcing the piece, which can tear the mold or crack the resin.
Substrate matters too. Resin bonds differently to metal, wood, polymer clay, and other base materials. A porous or oily substrate can keep the surface from curing evenly.
Preventing Tacky Resin Jewelry Next Time, and Handling Uncured Resin Safely
Prevention saves time and materials, and safe handling protects you while you troubleshoot. Build these habits into every project.
Prevention habits that actually move the needle
- Measure epoxy by volume or weight as the label specifies, and mix for the full recommended time, scraping the sides and bottom of the cup. Off-ratio or undermixed epoxy is the leading cause of permanently soft pieces.
- Keep layers thin enough for light to reach the full depth. For UV resin, thin coats cure more reliably than one thick pour, especially with dark pigments.
- Clean every surface before and after curing. Our step-by-step guide to making resin jewelry without bubbles shows the technique in detail. Oils from skin, mold release, and dust all interfere with a hard finish.
Safe handling of uncured resin
Uncured resin is the part that can irritate skin and eyes, so treat it with respect until it is fully cured.
- Skin protection: wear nitrile gloves, not latex, when mixing and handling uncured resin. If resin contacts skin, wash with soap and water; do not use solvents on skin.
- Ventilation: work in a well-ventilated space, and keep epoxy mixing away from food preparation areas.
- Eyes: wear safety glasses when mixing or pouring, and flush with water if resin splashes into eyes.
Cleaning up spills and tools
- Wipe up uncured spills with paper towels before they spread.
- Let resin residue on tools and towels cure fully under the lamp or in daylight, then dispose of it as solid trash.
- Clean reusable tools with isopropyl alcohol before the resin sets; once cured, resin must be peeled or sanded off.
Watch out: never pour leftover liquid resin or hardener down a drain or into household trash while still liquid. Let it cure solid first, then dispose of it according to your local waste guidelines.
A quick symptom-cause-fix reference
- Tacky surface, hard interior: underexposure. Clean, recure closer to the lamp, rotate.
- Soft throughout, UV resin: layer too thick or pigment too dark. Rebuild in thinner coats.
- Soft throughout, epoxy: off ratio, undermixed, or cold. Discard and remix carefully at room temperature.
Browse the Craft Living Artistry website for jewelry-making supplies, and check our product pages for current prices and availability.
Frequently Asked Questions
How can I fix tacky UV resin curing?
Tacky UV resin usually means the surface did not get enough light. Wipe the piece with isopropyl alcohol to remove the oxygen-inhibited layer, then cure it again under a UV lamp for an additional few minutes. Check that the lamp is close enough to the piece and that the pigment is not blocking light. If the surface is still tacky after a second cure, the layer may be too thick or the resin may be past its shelf life, so test a small amount separately before reworking the full piece.
How long does UV resin take to cure under a lamp?
Most UV resins cure in 1 to 5 minutes under a lamp rated for the resin’s wavelength, but thin layers cure faster than thick ones. Manufacturers list the recommended exposure time on the bottle, and that time is a starting point. Thicker pours or darker colors may need longer. Lamps lose output over time, so a lamp that has been used heavily may need extra minutes. Always confirm that the piece feels hard and does not leave residue on a fingertip.
Why is my resin still sticky after using a UV lamp?
Stickiness after lamp exposure often comes from three causes: the lamp is too weak or too far away, the layer is thicker than the resin is rated to cure in one pass, or dark pigment is blocking the light. Oxygen in the air also inhibits curing on the surface, which is why the top layer is often the last to harden. Measure the lamp distance, cure thin layers one at a time, and test your pigment in a small sample before committing to a full piece.
Can you cure UV resin without a UV light?
UV resin is designed to cure with ultraviolet light, so it will not harden reliably in ordinary room light or sunlight alone. Sunlight contains some UV, but the output is inconsistent and depends on the season, time of day, and window glass, which often blocks UV. For dependable results, use a dedicated UV lamp with a wavelength that matches the resin. If you do not have a lamp, a two-part epoxy is a better option for projects that must harden without special equipment.





0 Comments