
Quick Summary
The best resin jewelry polishing technique is wet sanding through a progressive grit sequence, then buffing with a polishing compound that is finer than your last grit. Start at a grit matched to the deepest scratch, cross-hatch each stage, and wait until the resin is fully cured before polishing.
- Start sanding at a grit matched to the deepest defect, around 220 to 400 for deep scratches.
- Sand wet, rinsing and wiping between every grit to avoid carrying coarse particles forward.
- Use cross-hatch sanding and stop each grit only when one scratch direction remains.
- Choose a compound finer than your last sandpaper grit, using a cutting stage if needed.
- Keep rotary tool speed low and let the piece cool between passes to avoid heat damage.
Table of Contents
- Why Resin Jewelry Loses Its Shine and When to Polish It
- Gear You Need: Sandpaper, Compounds, and a Resin Polishing Kit
- Technique 1: Wet Sanding Through a Grit-by-Grit Workflow
- Technique 2: Hand Polishing Versus a Rotary Tool
- Choosing the Best Polishing Compound for Epoxy Resin
- How to Polish Resin Jewelry at Home: Troubleshooting by Defect Type
- Safety, Dust Management, and When Not to Polish
- Booking Your Next Resin Project: Starter Kits and Supplies from Craft Living Artistry
- Frequently Asked Questions
Best Resin Jewelry Polishing Techniques for a Glass-Like Finish
Last Updated: November 6, 2026
Why Resin Jewelry Loses Its Shine and When to Polish It
Resin jewelry rarely loses its gloss all at once. Fine scratches from storage, a rough cut from a tumbler, or a cloudy patch from moisture can dull a piece that looked perfect the day it came out of the mold.
Resin jewelry polishing is the process of removing surface scratches and haze from cured resin, then restoring a smooth, high-gloss shine. It is different from repairing a crack or a bubble.
Polish when the surface is scratched, hazy, or uneven, and only after the resin has fully cured.
Check the cure state before you start
Do not sand or polish resin that is still tacky, soft, or slightly sticky. Heat and sanding friction can make an under-cured piece gum up or dent. Most epoxy resin needs a full cure before it can take abrasion well, and curing times vary by product and room temperature. You can also see a clear epoxy resin kit designed for high-gloss, glass-like results.
Gear You Need: Sandpaper, Compounds, and a Resin Polishing Kit
A basic setup needs four things: wet/dry sandpaper in a range of grits, a polishing compound, soft cloths, and a clean water supply. A resin polish kit built for restoring shine to scratched or dulled pieces is a practical starting point. For current pricing on kits and sandpaper, check the Craft Living Artistry website.
Other products suit specific situations. Check product labels and test any polishing compound on a scrap piece first.
For a quick overview of the core supplies:
| Item | Role in the Workflow | Best For |
|---|---|---|
| Wet/dry sandpaper | Removes scratches and levels the surface | Progressive sanding |
| Polishing compound | Restores gloss after sanding | Final shine |
| Soft microfiber cloth | Buffs and removes residue | Finishing |
| Mild dish soap and water | Cleans between stages | Keeping grit off the piece |
Technique 1: Wet Sanding Through a Grit-by-Grit Workflow
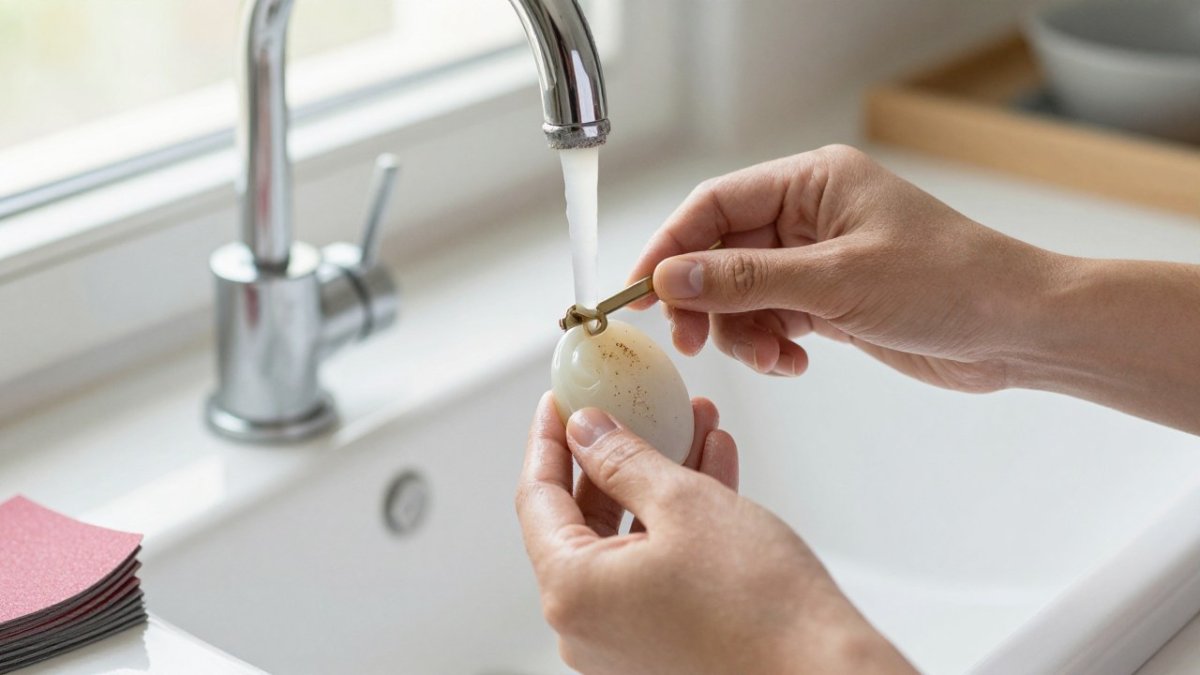
Wet sanding is the foundation of most resin polishing, and where most failed finishes begin. Water keeps the abrasive from loading up with resin dust, carries fine particles away so they do not re-scratch the piece, and keeps friction heat down. Dry sanding resin can clog paper quickly and leave a gummy film.
Choose your starting grit by defect depth
Do not start at the coarsest grit by default. Match the starting grit to the deepest defect you can see under a bright light at a low angle:
- Deep scratches, saw marks, or a rough cast edge: start around 220 to 400 grit. Use 220 only to level a genuinely uneven surface, and expect real time at each subsequent grit removing the coarse pattern.
- Light surface scratches and scuffs: start around 600 to 800 grit to avoid removing more material than necessary.
- Haze or cloudiness with no visible scratches: start around 1000 to 1500 grit, then move to compound.
A common pattern is to start one grit coarser than you think you need, confirm the defect is gone, then step back to the grit you intended. Starting too fine on a deep scratch wastes time because the finer paper cannot remove it.
The complete progression
A full workflow for a scratched piece runs: 400 → 600 → 800 → 1000 → 1500 → 2000 → 2500 → 3000, then compound. You do not have to use every grit, but do not skip more than one step.
Soak wet/dry paper in clean water for five to ten minutes before use so it lies flat and does not curl. Keep a shallow tray of water beside your work area and dip the paper frequently. Add a drop of mild dish soap to help the paper glide and keep resin dust suspended rather than packed into the abrasive.
Cross-hatch technique and stopping criteria
Sand in one direction with light, even pressure, covering the whole face. Then turn the piece 90 degrees and sand the next grit in the perpendicular direction.
Stop at each grit when all three of these are true:
- Under a bright light held at a low angle, you see only the scratch pattern of the current grit, running in one direction.
- The surface looks uniformly matte, with no shiny low spots or leftover coarse marks.
- Running a fingernail lightly across the surface feels even, with no ridges catching the nail.
If any of those fail, keep sanding at the same grit. Rushing the coarse stages is the most common reason a piece ends up hazy after compound.
Watch out: sanding through the resin into an inclusion, a bezel, or the base material can ruin the piece, check thickness at the edges before you start and use lighter pressure near embedded objects.
Cleaning between grits
Rinse the piece in clean water and wipe it with a soft cloth between every grit. A single stray coarse particle will carve new scratches at the next finer grit, and you will chase them for the rest of the workflow. Change cloudy water, and keep separate trays for coarse and fine stages if you can.
Technique 2: Hand Polishing Versus a Rotary Tool
Once sanding is finished, you choose how to bring up the shine. Hand polishing with a soft cloth and a small amount of compound takes longer but gives full control over pressure and the most care for small or intricate pieces.
A rotary tool speeds up the work, especially on larger, flat surfaces. A cordless rotary tool can speed up polishing on larger, flat surfaces.
Heat control when using a rotary tool
Heat is the main risk with a rotary tool. Use a low speed, keep the pad moving in overlapping passes, and let the piece cool between passes. If the resin feels warm to the touch, stop and wait. Overheating can soften the surface, cause hazing, or leave swirl marks that are difficult to remove.
Choosing the Best Polishing Compound for Epoxy Resin
Polishing compounds are fine abrasives suspended in a paste, liquid, or stick. Their job is to remove the very fine scratches left by your last sanding grit and bring up a reflective surface. The right choice depends on two things: how fine you sanded before switching to compound, and whether you want a true polish or a protective top coat.
Match the compound to your last grit
A useful rule of thumb is that the compound should be finer than your last sandpaper grit. If you stopped at 1000 grit, start with a medium-cut compound and finish with a fine polish. If you worked up to 2500 or 3000 grit, a single fine finishing polish is usually enough. A coarse compound after fine sanding re-introduces scratches you already removed.
Think in three stages:
- Cutting compound: removes 1000-to-1500-grit scratch patterns. Use a foam or felt pad with light pressure.
- Polishing compound: removes the haze left by the cutting stage and brings up gloss. This is where most resin jewelry finishes are won.
- Finishing polish or wax: adds the last bit of clarity and a protective layer. Optional, but it helps jewelry that gets handled often.
Compound types and what they suit
- Liquid plastic polishes are convenient for small pieces and mild haze, and forgiving on intricate shapes because you can work them into details with a cloth or soft brush.
- Paste compounds give more cut and suit larger flat faces or pieces coming off a coarse sanding stage. They need more wiping to remove residue.
- Stick compounds are designed for rotary buffing wheels. They load the wheel evenly and suit production-style work, but demand heat control because the wheel generates friction fast.
A common pattern among makers is to keep one medium-cut liquid polish and one fine finishing polish on hand rather than buying many products. Test any new compound on a scrap piece of the same resin batch before touching a finished pendant, resins vary in hardness, and a compound that works on one pour can leave haze on another.
Application mechanics that affect the result
Use a small amount of compound, roughly the size of a grain of rice for a pendant. Too much leaves residue that dries hazy and is hard to remove from crevices.
Wipe residue with a clean, dry microfiber cloth, then clean the piece with mild dish soap and water and dry it fully before judging the shine.
Watch out: mixing compound brands or stages on the same pad can carry coarse grit into the finishing step and leave swirl marks that look like sanding errors, label your pads and keep them separate.
When to skip compound entirely
If the piece came out of the mold glossy and only needs a light clean, a soft cloth and a plastic polish may be all you need. If the surface is uneven or scratched, compound alone will not fix it, go back to sanding. If the resin is still soft or tacky, no compound will produce a stable shine; let it cure first.
How to Polish Resin Jewelry at Home: Troubleshooting by Defect Type
Most polishing problems come from one of a few causes. Match the symptom to the likely fix:
- Fine swirl marks: The last sanding grit was too coarse. Go back one or two grits and work up again.
- Cloudy or hazy patches: Compound residue or heat haze. Clean the piece with mild dish soap and water, then buff with a dry microfiber cloth.
- Deep scratches that remain: Restart sanding from a coarser grit, because finer paper cannot remove deep marks.
Work around inclusions such as dried flowers, glitter, or embedded objects with extra care. Use light pressure near them so you do not dislodge the material or tear the surface.
Safety, Dust Management, and When Not to Polish
Sanding resin creates fine dust that should not be breathed in or left on skin. Work near an open window or under a fan, wear a mask rated for fine particles, and wear gloves.
Do not polish a piece that is still curing, cracked, or peeling away from its base. Polishing will not fix structural damage, and aggressive sanding can make it worse.
Booking Your Next Resin Project: Starter Kits and Supplies from Craft Living Artistry
Ready to start a resin project? Craft Living Artistry offers a curated range of jewelry-making supplies. For current pricing and availability, visit the Craft Living Artistry website or contact the team for a quote, since prices depend on quantity and delivery.
Keep a dedicated polishing setup on hand so you can restore shine whenever a piece needs it. For decorative designs on future projects, try an embossing craft punch tool.
Frequently Asked Questions
How do you polish resin jewelry?
Start by sanding the piece with wet sandpaper, moving through progressively finer grits until the surface looks uniformly frosted. Clean it with mild dish soap and water, then apply a polishing compound on a soft microfiber cloth using small circular motions and even pressure. Buff until the surface reflects light clearly. Work slowly around edges and inclusions, and check the piece under good light after each stage to confirm scratches have disappeared before moving on.
What is the best way to polish epoxy resin?
The most reliable method combines wet sanding with a fine-grit progression and then a polishing compound. Wet sanding removes scratches and dull patches, and the compound restores gloss. Hand polishing gives more control on small jewelry pieces, while a rotary tool with a polishing pad speeds up flat surfaces. Keep the resin cool, since heat can cloud or soften it, and make sure the piece is fully cured before you begin.
What polishing compound works best for epoxy resin?
Fine polishing compounds and abrasive pastes designed for plastics are commonly used on epoxy resin. Test any compound on a hidden area first, since results vary by resin formula.
Can you polish resin jewelry by hand?
Yes. Hand polishing works well for small pendants, rings, and earrings because you can control pressure around edges, settings, and inclusions. Use a soft cloth, a small amount of compound, and light circular motions. Hand polishing takes longer than a rotary tool, but it reduces the risk of overheating the resin or rounding sharp edges.
Polishing resin is a skill that improves with practice. Work methodically through the grits, check the cure state, control heat, and test every compound before you commit to a finished piece. With the right gear and patience, you can bring a dull pendant back to a glass-like finish.




0 Comments