
Last Updated: November 5, 2026
Quick Summary
To organize a home pottery studio, first choose a room with a hard floor, reliable power, ventilation, and space to move, then arrange the wheel, worktable, clay storage, drying shelves, and cleanup zone in a workflow order. Start with a short list of essential tools and store clay in sealed bins so you can find everything quickly.
- Choose a room with hard flooring, electrical access, ventilation, water access, and space for drying shelves.
- Place the wheel first, since it is the largest piece and needs power nearby.
- Set drying shelves away from foot traffic so pieces can sit undisturbed.
- Store clay in sealed bins and label every glaze jar with its name and date.
- Avoid carpet, because clay dust works into fibers and is hard to remove.
Table of Contents
- Choosing the Right Room for Your Home Pottery Studio
- Planning a Small Home Pottery Studio Layout and Workflow
- Positioning the Pottery Wheel, Worktable and Kiln
- Selecting Essential Home Pottery Studio Equipment
- Organizing Shelves, Clay Storage and Glaze Labeling
- How to Organize a Home Pottery Studio on a Budget
- Setting Your Studio Up for Safe, Clean Daily Use
- Booking Your First Session and Budgeting Your Studio Cost
- Frequently Asked Questions
Choosing the Right Room for Your Home Pottery Studio
A home pottery studio is easier to set up than most people expect, and it starts with picking the right room. This step-by-step guide will help you organize a home pottery studio that fits your space, your budget, and your hobby.
The best room has three things: a hard floor, reliable power, and room to move. Basements, garages, sunrooms, and spare bedrooms all work well. Pick a room you can keep clean, because clay dust gets everywhere.
Here’s a quick checklist for narrowing your options:
- Hard flooring: Tile, concrete, or vinyl are easiest to sweep and mop
- Electrical access: Outlets nearby for a wheel and any kiln you plan to add
- Ventilation: A window or exhaust fan helps with fumes and dust
- Water access: A nearby sink or bucket saves trips back and forth
- Space to dry work: Room for shelves where pieces can sit undisturbed
Step 1: Walk through each candidate room and rate it against this list.
Step 2: Pick the room with the most checkmarks. Don’t worry if it’s not perfect.
Watch out: Avoid carpet. Clay dust works its way into fibers and is hard to remove.
Planning a Small Home Pottery Studio Layout and Workflow
A small home pottery studio works best when you plan the layout around how you move: clay in, work on the wheel, pieces to drying, then cleanup. A simple layout keeps you from walking back and forth across the room.
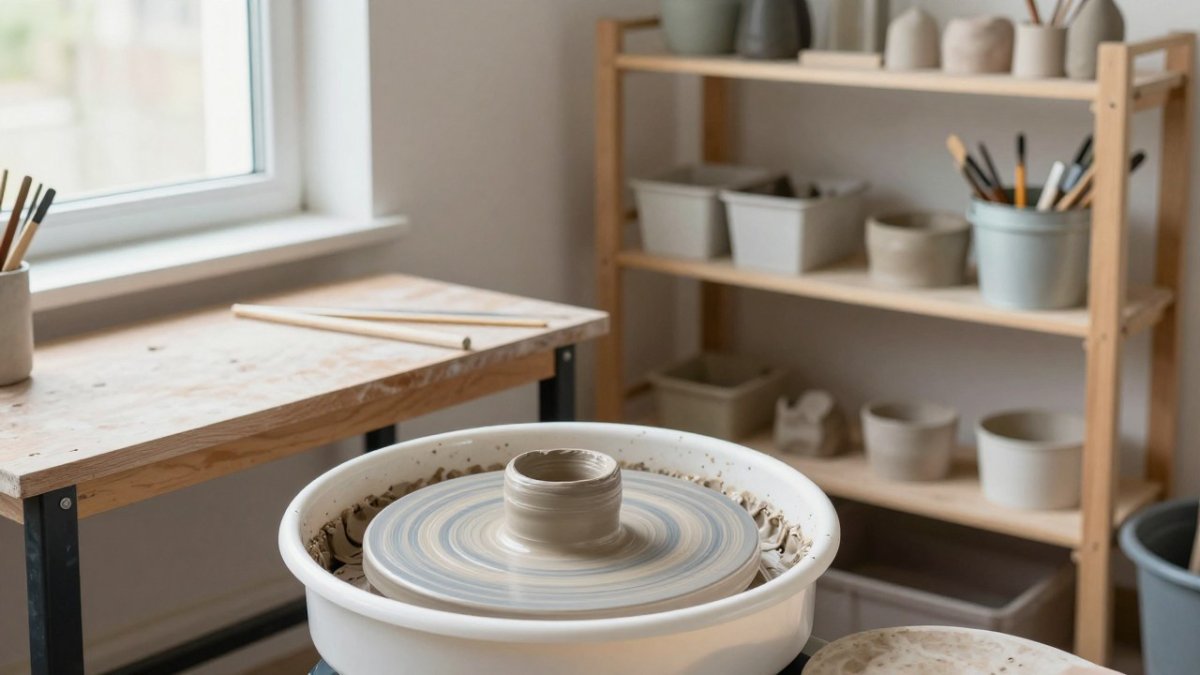
Sketch your room on paper first. Mark the doors, windows, and outlets. Then place your wheel and worktable so you can reach your clay storage without stepping over anything.
Follow these steps to plan your workflow:
- Place the wheel first. It’s the largest piece and needs power nearby.
- Put the worktable beside it. Keep it within arm’s reach.
- Add clay storage close to the wheel. Store wedged clay where you can grab it fast.
- Set drying shelves away from foot traffic. Pieces need to sit undisturbed.
- Create a cleanup zone near the sink. This is where tools get washed.
| Zone | What Goes There | Best Spot |
|---|---|---|
| Wheel station | Pottery wheel, stool | Near an outlet |
| Work area | Worktable, tools | Beside the wheel |
| Clay storage | Bins of clay | Near the wheel |
| Drying shelves | Pieces in progress | Away from traffic |
| Cleanup zone | Sink, buckets, sponges | Near water |
A small room is fine. Use vertical space with tall shelves, and fold up or store tools you use less often.
Positioning the Pottery Wheel, Worktable and Kiln
Position the wheel and worktable first, then decide where the kiln goes. Wheels need a stable, level floor, while kilns need proper electrical and ventilation.
Place the wheel on a solid base where it won’t rock. Leave enough room behind you to sit and move freely. The worktable should sit at a comfortable height, usually near your waist, so you aren’t hunching over your work.
If you plan to add a kiln, keep it away from the wheel and any flammable materials. Check that the outlet can handle the kiln’s power needs before you buy. Ask an electrician to confirm if you’re unsure.
Watch out: Never run a kiln on an extension cord. The load can overheat the cord and create a fire hazard.
Selecting Essential Home Pottery Studio Equipment
You don’t need a full professional setup to start. A short list of core tools covers most of what beginners and semi-professionals use every day.
Start with these essentials:
- Pottery wheel: An electric wheel with variable speed control is a good all-around choice. You can browse options like our Electric Pottery Wheel Machine to see what’s available.
- Worktable: A sturdy table with a smooth, wipeable top
- Wire cutter and loop tools: For trimming and shaping
- Sponges and buckets: For wet work and cleanup
- Storage bins: Airtight containers keep clay from drying out
For a fuller list, our Beginner Pottery Clay Tools: Essential Kit for 2026 guide covers what to buy first. Many studios start with a small kit and add tools as their skills grow.
Organizing Shelves, Clay Storage and Glaze Labeling
Good storage saves time and keeps your studio clean. The goal is to find what you need in seconds, not minutes.
Use open shelving for tools and finished pieces. Keep clay in sealed bins, since air dries it out fast. Label every glaze jar with its name, the date you opened it, and the firing temperature.
A simple labeling system helps:
- Color-code bins: Assign one color to each clay body
- Label glaze jars: Write the name and date on the lid
- Keep a glaze log: Note which glazes worked on which clay
- Store glazes off the floor: Spills are easier to contain on a shelf
Heavy items belong on lower shelves. Keep the top shelves for light, frequently used tools.
How to Organize a Home Pottery Studio on a Budget
You can set up a home pottery studio without spending a fortune, but the smartest approach is to separate one-time equipment costs from recurring supply costs and decide which tier fits your space and commitment level. A starter setup can cost far less than a full professional studio, and much of the difference is usually in the wheel and kiln.
Think in three tiers:
- Starter tier: A secondhand electric wheel, a sturdy folding table, a basic hand-tool kit, two or three buckets, and airtight bins for clay. This tier covers wheel throwing and handbuilding without a kiln.
- Intermediate tier: Add a dedicated worktable, a set of throwing bats, a wire cutter, and a small shelf unit. If you fire at home, budget for a kiln and an electrician’s visit to confirm the circuit.
- Full studio tier: Add a kiln, a slab roller or extruder, a dedicated glaze area, and a ventilation fan. This tier is where electrical work and ventilation become major line items.
Secondhand shopping is where the biggest savings live. Pottery wheels are durable machines, and used wheels are often sold secondhand when owners upgrade. Inspect a used wheel for a smooth-spinning wheel head, a working pedal, and no cracks in the frame.
Recurring costs are easy to underestimate. Clay, glaze materials, bats, sponges, and kiln firing all add up month to month. Buy clay in bulk once you know which body you like, and keep a simple log of what you spend so you can see whether your hobby is tracking to your budget.
Watch out: A used kiln can look like a bargain until you discover it needs a new element or a dedicated circuit, so factor an electrician’s inspection into the price before you commit.
Setting Your Studio Up for Safe, Clean Daily Use
Clay dust is the biggest health concern in a home studio. Fine dust from clay can settle on surfaces, so the goal is to keep dust from becoming airborne in the first place. A consistent wet-cleaning routine matters a great deal for keeping dust down in a home studio. Our guide on how to dry pottery clay without cracks covers a clean drying routine for your pieces.
Start with ventilation. A window fan that exhausts air to the outside is more effective than a fan that simply circulates air inside the room. If you sand dry pieces or mix dry clay, work near the exhaust and wear a NIOSH-approved N95 respirator, not a cloth mask or a surgical mask.
Keep dust from spreading with a three-zone cleaning system:
- Wet-clean surfaces: Wipe worktables, wheel heads, and shelves with a damp sponge or mop after every session. A dry broom or dry rag just launches dust back into the air.
- Contain slurry: Let clay slurry settle in a bucket, pour off the clear water, and dispose of the sludge in the trash. Never pour slurry down a drain, because it hardens in pipes.
- Separate cleanup tools: Keep a dedicated sponge, bucket, and mop for the studio so clay dust does not travel into the rest of the home on household cleaning supplies.
A simple daily routine keeps exposure low:
- Before you start: Turn on exhaust ventilation and lay down a work mat.
- While you work: Keep lids on clay and glaze containers, and avoid dry-sanding unless you are at the exhaust with a respirator on.
- After you finish: Wipe surfaces with a damp method, rinse tools in a bucket, and close containers.
- Once a week: Mop the floor, wipe shelves, and check that the exhaust fan is pulling air outward.
Watch out: Dry sweeping releases a burst of fine silica dust that can hang in the air long after you finish, so always use a damp method even for a quick cleanup.
If you fire a kiln, place it in a well-ventilated area and follow the manufacturer’s clearance requirements. Kiln fumes and heat need a dedicated exhaust path, and a kiln should never share a circuit with other high-draw equipment.
Booking Your First Session and Budgeting Your Studio Cost
Once your studio is set up, try a first session to test your layout and workflow. Note what slows you down, then adjust.
Plan your budget around three areas: equipment, materials, and ongoing supplies like clay and glaze. Track what you spend each month so you can see where your money goes.
To get started, browse the full range at Craft Living Artistry, and when you’re ready to build your kit, explore our guide on how to organize a professional pottery studio space. We’re here to help you create a studio that fits your craft.
Frequently Asked Questions
What are some good ideas for organizing my pottery studio?
Group tools by task so the items you use together sit together: trimming tools near the wheel, glazes on labeled open shelves, and clay stored in lidded bins by type. Keep a small rolling cart for in-progress work so pieces can move between drying and glazing without blocking the worktable. Label every bin and shelf with a clear name and a date for glazes and clay batches. Reviewing the setup once a month to return misplaced tools to their zones keeps the system working.
How much does it cost to set up a home pottery studio?
Costs vary widely with the equipment you choose, whether you buy new or used, and how much you already own. Pricing depends on the wheel, kiln access, shelving and storage, and the materials you start with, so check current prices directly at Craft Living Artistry or with your preferred suppliers before planning a budget. Starting with a basic set of tools, a few bins and open shelving keeps early spending low, and you can add a kiln or a second wheel once you know your workflow.
How can I organize a small pottery studio?
Start by mapping your floor space and using vertical storage such as wall-mounted shelves and rolling carts. Place the wheel and worktable first, then fit storage around them so the main work path stays clear. Use stackable lidded containers for clay and bagged supplies, and keep daily tools in a single caddy you can carry to the wheel. Wipe-down surfaces and a dedicated dust-control routine make a small room easier to keep clean.
What equipment do you need for a home pottery studio?
A basic home studio needs a stable worktable, a pottery wheel or hand-building station, a set of trimming and shaping tools, wedging space, clay storage, a sponge and water bucket, and shelving for drying and finished work. A kiln or access to firing services is required to finish most pieces. Choose equipment based on the work you plan to do, and add specialized tools only after you have used the basics for a few projects.
Ready to set up your own studio? Start with one room, one wheel, and one shelf, and build from there. Craft Living Artistry carries the tools and supplies to help you grow your skills one session at a time.







0 Comments