
Table of Contents
- Understanding the Pottery Lifecycle Timeline
- Essential Pottery Tools for Beginners
- Choosing Your Clay: Types and Properties
- Hand Building vs. Wheel Throwing: Which Path Is Right for You?
- Beginner Pottery Projects to Build Your Skills
- Setting Up Your Home Studio Space
- Kiln Requirements and Air-Dry Alternatives
- Community, Sustainability, and the Mindfulness Benefits
- Frequently Asked Questions
Last Updated: September 19, 2026
Understanding the Pottery Lifecycle Timeline
How to start a pottery hobby begins with understanding the complete journey from raw clay to finished piece. The pottery lifecycle spans several distinct phases, each with its own techniques, tools, and decision points. Beginners often jump into one technique without realizing how it fits into the broader workflow.
The timeline typically moves through these stages: clay selection and preparation, hand-building or wheel throwing, leather-hard finishing, bisque firing, glazing, and final firing. Some potters skip firing entirely by using air-dry clay or polymer clay alternatives. Understanding this progression helps you choose the right starting point and avoid investing in equipment you won’t need.
Most beginners start with hand-building techniques like pinch pots or coil building because they require minimal equipment. Wheel throwing comes later once you’ve developed hand control and understand clay behavior. Air-dry alternatives let you skip kiln access entirely, which removes a major barrier for hobbyists setting up at home.
The pottery lifecycle isn’t linear, many potters cycle through multiple projects at different stages simultaneously. You might have greenware drying while bisqueware fires and glazed pieces cool. This workflow matters when planning your studio space.
Essential Pottery Tools for Beginners
Starting how to start a pottery hobby means gathering the right tools without overwhelming yourself. Most beginners make the mistake of buying complete tool sets when they only need a handful of essentials. Craft Living Artistry provides thoughtfully curated product selections that give you exactly what you need without the clutter.
Hand-Building Essentials
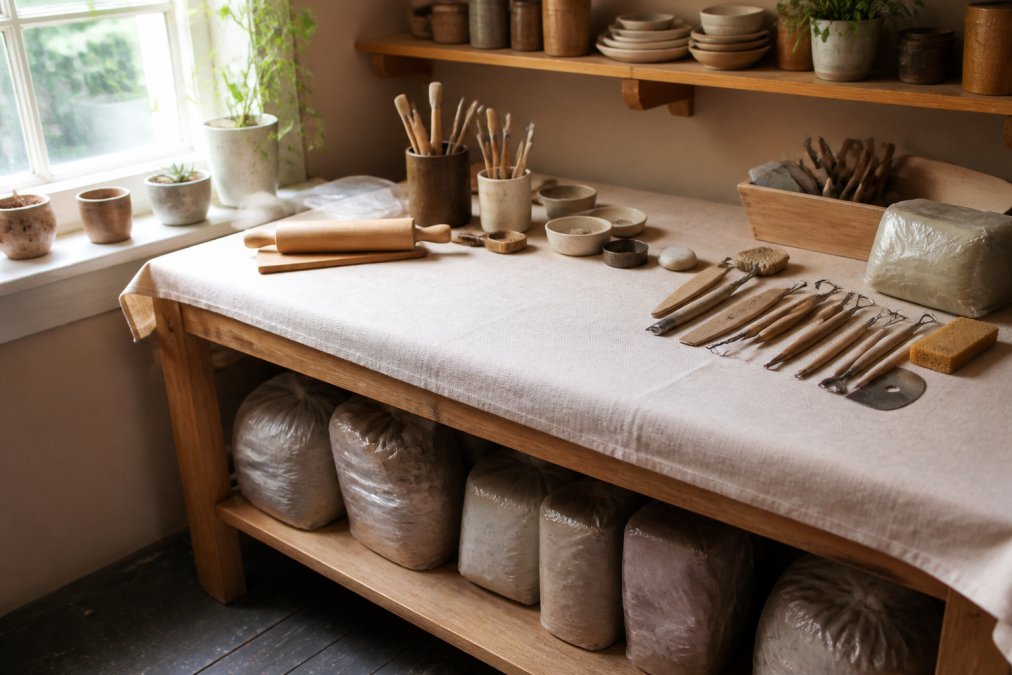
Hand-building requires surprisingly few tools. A wooden modeling tool, wire clay cutter, sponge, and your hands form the core toolkit. Add a needle tool for detail work and a ribbon tool for smoothing. These five items handle 90% of beginner hand-building projects.
Natural sponges matter more than synthetic ones, they absorb water without leaving lint. Wire cutters separate clay cleanly without dragging. Wooden tools won’t scratch leather-hard clay the way metal does. Many beginners buy ceramic tool sets with 20 pieces they never use; start minimal and add tools as specific techniques demand them.
Scoring tools create texture and help join pieces together. A simple fork or toothpick works initially, but a dedicated scoring tool gives cleaner results. The investment is minimal.
Finishing and Decorating Tools
Once your piece reaches leather-hard stage, finishing tools refine the surface. Trimming tools remove excess clay from bases and create clean edges. A loop tool carves away material efficiently. Burnishing tools smooth surfaces to near-ceramic finish before firing.
Decorating tools include underglaze pencils, brushes, and stamps. Underglaze applies color before bisque firing, giving you permanent decoration. Brushes range from fine detail to broad coverage. Many potters use household items, old toothbrushes, sponges, and natural materials create unique textures.
Glazing requires different brushes than underglaze work. Soft bristles apply glaze without creating brush marks. Hard bristles are better for detail work and texture application. Keep separate brush sets to prevent glaze contamination of underglazes.
Choosing Your Clay: Types and Properties
The clay you choose shapes your entire pottery experience. Air-dry clay, polymer clay, earthenware, stoneware, and porcelain each behave differently and suit different projects. Understanding these differences prevents frustration and wasted materials.
Air-dry clay requires no kiln, making it ideal for beginners without firing access. It hardens through evaporation over several days. The downside: it’s brittle once dry and unsuitable for functional pieces like cups or bowls. Polymer clay fires in a home oven at low temperature, creating durable, food-safe results for decorative work.
Traditional ceramic clays require kiln firing. Earthenware fires at lower temperatures (cone 04-06) and produces porous, rustic pieces.
Start with earthenware if you have kiln access, it’s forgiving, fires reliably, and teaches fundamentals. Use air-dry clay if you’re testing the hobby without committing to studio fees.
Hand Building vs. Wheel Throwing: Which Path Is Right for You?
This decision fundamentally shapes your pottery journey. Hand-building and wheel throwing develop different skills, require different equipment, and suit different temperaments. Understanding the tradeoffs helps you choose the right starting point.
Hand-Building Techniques: Pinch Pots and Coil Building
Hand-building requires no electricity, no kiln initially, and minimal equipment investment. Pinch pots, formed by pinching clay between thumb and fingers, teach basic clay control and are complete in 30 minutes. Coil building stacks rolled clay ropes to create larger forms. Slab work flattens clay into sheets for geometric forms.
Wheel Throwing Fundamentals
Wheel throwing centers clay on a spinning surface and shapes it with hands and tools. The learning curve is steeper, centering clay takes weeks of practice. Once centered, pulling clay upward creates cylinder walls. Trimming removes excess clay from the base.
Most potters benefit from learning hand-building first. Wheel throwing feels impossible initially, centering clay requires 30-50 attempts before success. Starting with hand-building builds confidence and clay understanding before attempting the wheel.
Beginner Pottery Projects to Build Your Skills
Strategic project selection accelerates skill development. Choosing projects that teach specific techniques prevents wasted time and materials. A logical progression builds confidence and capability.
Create a progression table for your first 12 months:
| Month | Project | Technique | Key Skill | Firing |
|---|---|---|---|---|
| 1 | Pinch bowl | Hand-building | Clay sensitivity | Air-dry or bisque |
| 2 | Coil pot | Coil building | Structure | Bisque |
| 3 | Slab planter | Slab work | Geometry | Bisque |
| 4 | Textured vessel | Hand-building | Surface detail | Bisque + glaze |
| 5-6 | Wheel cylinder | Throwing | Centering | Bisque |
| 7-8 | Wheel bowl | Throwing | Pulling walls | Bisque + glaze |
| 9-12 | Combined forms | Multiple techniques | Integration | Bisque + glaze |
Setting Up Your Home Studio Space
Your studio doesn’t require a dedicated room or expensive equipment. Many successful hobbyists work in kitchen corners, garage spaces, or shared studio facilities. The key is organizing your space for efficiency and safety.
Kiln Requirements and Air-Dry Alternatives
This decision determines your pottery path more than any other factor. Kiln access requires either studio membership, shared facility fees, or home kiln investment. Air-dry alternatives eliminate this barrier but limit your options.
Air-dry clay suits hobbyists without studio access, those testing the hobby, and anyone making decorative pieces. Traditional ceramics suit potters committed to functional ware and willing to invest in studio access.
Community, Sustainability, and the Mindfulness Benefits
Pottery offers benefits beyond the finished pieces. Community connection, sustainable practice, and mindfulness benefits make the hobby valuable beyond the ceramics themselves.
Frequently Asked Questions
Do I need a kiln to start a pottery hobby?
No. You can start pottery with air-dry clay or polymer clay, which don’t require firing. However, if you want to work with traditional ceramic clay and create durable, glazed pieces, a kiln is necessary. Many beginners use community studio kilns or take classes at local pottery studios before investing in their own equipment. This approach lets you explore the hobby affordably and discover whether wheel throwing or hand-building suits you best before committing to a kiln purchase.
What are the essential pottery tools for beginners?
Start with basic hand-building tools: a wire clay cutter, wooden modeling tools, sponges, and a needle tool for detail work. You’ll also need a rolling surface, a spray bottle for keeping clay moist, and sculpting loops. If you plan to use a pottery wheel, you’ll need trimming tools and a bat system. Most beginners find that a focused starter kit with quality essentials works better than buying dozens of tools at once. Prioritize tools that handle multiple tasks rather than single-purpose items.
How much does it cost to start a pottery hobby?
Entry costs vary widely depending on your approach. Hand-building with air-dry or polymer clay requires minimal investment for basic tools and materials. Working with traditional ceramic clay at a community studio or pottery class typically involves session or membership fees. Setting up a home studio with a pottery wheel and kiln is a significant investment. Most beginners start small with hand-building or classes, then expand their setup as their skills and commitment grow.
Is pottery a difficult hobby to learn?
Hand-building techniques like pinch pots and coil building are accessible to beginners and produce satisfying results quickly. Wheel throwing has a steeper learning curve, centering clay and achieving consistent shapes takes practice, typically several weeks of regular work. The good news is that pottery rewards consistent effort; most beginners see noticeable improvement within a month of regular practice. Starting with hand-building builds confidence and understanding of clay before moving to the wheel.
What beginner pottery projects should I start with?
Begin with pinch pots, simple, forgiving, and finished in one session. Progress to coil building for bowls and larger forms, then try slab construction for tiles or boxes. These hand-building methods teach you how clay behaves without the complexity of a wheel. Once comfortable, attempt simple wheel-thrown projects like cylinders and bowls. Each project builds muscle memory and clay intuition. Avoid complex forms early; focus on understanding greenware, leather-hard clay stages, and basic glazing before tackling ambitious designs.
Can I do pottery at home without a wheel or kiln?
Yes. Hand-building with air-dry clay or polymer clay requires no kiln or wheel. You can create functional and decorative pieces using pinch pots, coil building, and slab techniques entirely at home. Air-dry clay is affordable and mess-free; polymer clay can be hardened in a regular kitchen oven. For traditional ceramic work at home, some potters use bisqueware (pre-fired clay bodies) and apply glazes without firing. This approach lets you explore the craft’s creative side while avoiding equipment costs initially.
Should I take a pottery class or teach myself?
Classes offer hands-on guidance, access to kilns and wheels, and immediate feedback on technique, invaluable for learning wheel throwing and firing processes. However, many potters start with self-taught hand-building using books, videos, and online tutorials. A hybrid approach works well: start with a beginner class to learn fundamentals and safety, then practice hand-building at home between sessions. Classes also connect you to the pottery community, which provides ongoing support, studio access, and creative inspiration.





0 Comments