
Table of Contents
- The Real Reasons Your Jewelry Projects Look Cheap
- Jewelry Making Mistakes to Avoid: Materials and Construction
- How Fake Gemstones and Plastic Components Ruin Your Design
- Best Jewelry Findings for Beginners: Clasps, Jump Rings, and More
- Jewelry Finishing Techniques for a High-End Look
- Over-Stacking and Cluttered Jewelry Design: Why Less Is More
- How to Identify High-Quality vs. Cheap Jewelry: Weight, Feel, and Luster
- Photography and Lighting: Making Your Jewelry Look Professional
- Frequently Asked Questions
Last Updated: September 12, 2026
The Real Reasons Your Jewelry Projects Look Cheap
Your jewelry projects look cheap because of construction flaws and material choices, not because you lack talent. Beginner makers often blame their skills when the real culprits are uneven wire wraps, plated base metal, and mismatched components that no technique can rescue.
The difference between a piece that sells and one that sits in a drawer usually comes down to three things: the quality of your findings, how consistently you finish edges and connections, and whether your proportions read as intentional. Below, we’ll show you exactly how to diagnose each problem and fix it, starting with the mistakes that sabotage most beginner work.
Most “cheap-looking” jewelry fails on materials and finishing, not design. Fix your findings and your wraps before you redesign anything.
Jewelry Making Mistakes to Avoid: Materials and Construction
The most common jewelry making mistakes to avoid fall into two categories: sloppy construction and cheap base materials. Both show up immediately under close inspection, and both are fixable once you know what to look for.
Poor Craftsmanship and Finishing
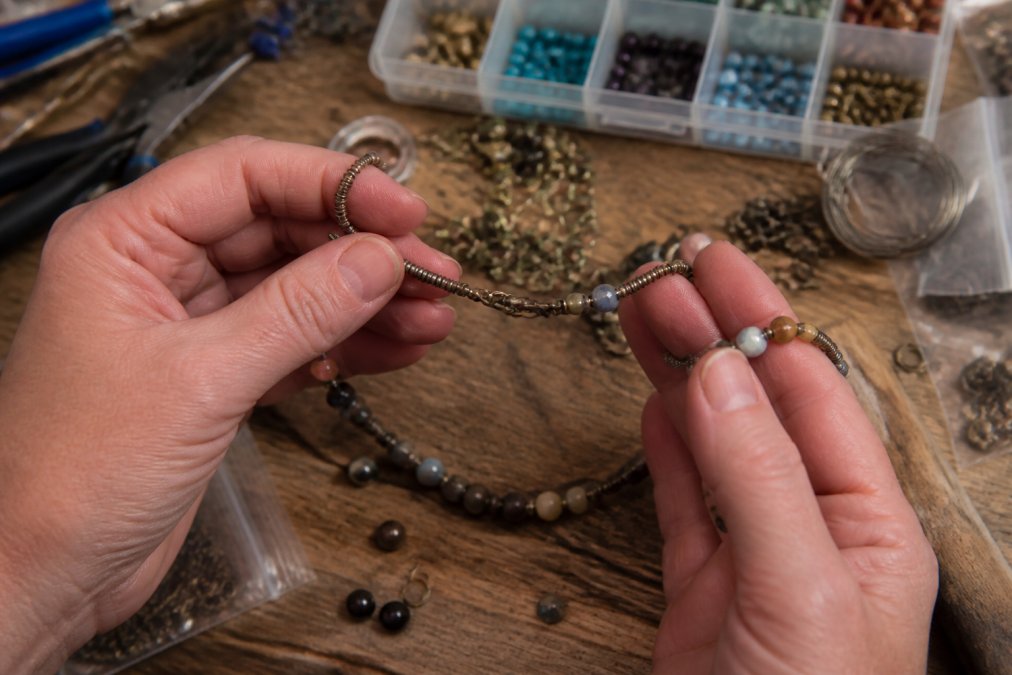
Uneven wire wraps, visible crimp beads, and sharp edges are the fastest ways to make a piece look homemade in the worst sense. A common mistake is cutting wire too short, which forces you to crimp twice and leaves a lumpy connection. In practice, a clean finish comes down to three habits:
- Cut wire with enough tail to wrap two full coils
- Tuck every tail flush with a crimp bead or wire guardian
- Burnish metal edges with a polishing cloth before assembly
The Gemological Institute of America’s jewelry care guidance notes that surface finish and edge quality are among the first things an appraiser inspects, because they signal how the piece was constructed.
Low-Quality Metal Plating and Alloys
Plated base metal is the single biggest giveaway. Thin gold plating over brass or copper wears through at contact points within weeks, exposing a dull alloy underneath. Look for plating thickness measured in microns; anything under 1 micron wears fast. Nickel-free options exist, but “nickel-free” alone doesn’t mean durable. Sterling silver, solid brass, and gold-filled wire cost more but hold their finish far longer.
Skipping a protective sealant on plated findings lets skin oils and humidity accelerate oxidization. Without it, a piece can tarnish within days of wear.
How Fake Gemstones and Plastic Components Ruin Your Design
Fake gemstones and plastic components undermine a design because they lack the weight, luster, and color depth of real stones, and the eye registers that absence instantly. Even a well-constructed piece reads as costume jewelry when acrylic beads sit next to metal findings.
Color Inconsistencies in Gold Plating
Gold plating varies between manufacturers, so mixing findings from different suppliers often produces a patchwork of yellows, greens, and rose tones. Buy your findings in a single batch from one source when possible. If you must mix, test under daylight before assembly. Under warm indoor lighting, mismatched plating is nearly invisible, which is why so many makers don’t notice until a customer photographs the piece outdoors.
Signs of Tarnished or Oxidized Metal
Tarnish appears as a dull gray or black film, most often on copper, brass, and low-grade silver. Oxidization is a chemical reaction with sulfur and moisture in the air. You can slow it with anti-tarnish storage strips and airtight bags, but you can’t reverse cheap plating that has already worn through. Prevention beats polishing every time.
Best Jewelry Findings for Beginners: Clasps, Jump Rings, and More
The best jewelry findings for beginners are sterling silver or gold-filled clasps, soldered or heavy-gauge jump rings, and crimp covers that hide your connections. These four components do more for perceived quality than any bead choice.
| Finding | Material to Choose | Why It Matters |
|---|---|---|
| Clasp | Sterling silver or gold-filled | Holds tension, resists tarnish |
| Jump rings | 18-20 gauge, soldered | Won’t pull open under weight |
| Crimp beads | Tube style with covers | Hides connection points |
| Wire | Gold-filled or sterling | Holds shape, resists oxidization |
A common mistake is buying the cheapest jump rings available, then wondering why a bracelet opens mid-wear. Unsoldered rings under 20 gauge deform with light pressure. Spend the extra on soldered rings and you eliminate an entire category of failure.
Jewelry Finishing Techniques for a High-End Look
Jewelry finishing techniques for a high-end look focus on consistency: uniform wraps, polished edges, and deliberate texture. The goal is for every connection to look like it was made on purpose.
- Tumble-polish finished pieces for 30-60 minutes to work-harden wire and remove micro-burrs
- Use a burnisher on flat surfaces to compress metal and boost luster
- Apply a thin sealant to plated areas at contact points
- Photograph each piece under daylight before calling it done
The U.S. Federal Trade Commission’s jewelry advertising guidance requires accurate labeling of plated and filled metals, which means your finish quality has to match what you claim. A piece labeled “gold-filled” must meet specific thickness standards, so verify your supplier’s specs before you sell.
Tumble polishing does double duty: it removes the tiny burrs that catch on fabric and hardens the wire so your wraps hold their shape longer.
Over-Stacking and Cluttered Jewelry Design: Why Less Is More
Over-stacking and cluttered jewelry design make a piece look cheap because the eye has no focal point. When five charms, three bead types, and two metal tones compete for attention, the brain reads chaos instead of intention, and chaos is the same signal it uses to flag mass-produced costume jewelry.
There’s a perceptual mechanism behind this. The human visual system assigns a “processing cost” to every element in a composition. When a piece has one clear focal point, the eye lands, resolves, and moves on, the piece feels deliberate. When it has five competing focal points, the eye keeps scanning without resolving, and that unresolved scan is what people describe as “cheap” or “homemade.” Designers sometimes call this the jewelry version of the uncanny valley: a piece that’s almost balanced but not quite triggers more discomfort than one that’s obviously simple.
Three proportion rules do most of the work:
- Pendant-to-chain ratio. A pendant should sit within the visual width of the chain, roughly no wider than 1.5x the chain’s apparent thickness. A large pendant on a thin chain reads as an afterthought; a tiny pendant on a heavy chain reads as a mistake.
- Bead-to-bead breathing room. A statement bead needs at least one bead’s width of negative space on either side. Cramming a focal bead against its neighbors flattens the whole strand.
- Metal tone count. One metal tone per piece. Two is a deliberate contrast; three is almost always an accident, and the eye registers it as such.
If you’re unsure whether a piece is over-stacked, try this test: photograph it, convert the photo to black and white, and squint. In grayscale, color can’t distract you, so you see only value and shape. If the piece reads as a single blob of similar values, it’s cluttered. If one element clearly dominates and the rest support it, the composition is working.
When a piece feels off but you can’t say why, remove one element and look again. Nine times out of ten it improves, and the tenth time, you’ve learned that the element you removed was actually the focal point.
The upgrade path for an over-stacked piece is usually subtraction, not addition. Pull one charm, swap a mixed-tone finding for a matching one, or replace a busy clasp with a clean lobster claw. These are five-minute changes that shift a piece from “craft fair” to “boutique” without touching the core design.
How to Identify High-Quality vs. Cheap Jewelry: Weight, Feel, and Luster
High-quality jewelry feels heavier than it looks, has a warm depth to its luster, and moves without rattling. Cheap pieces feel light, look flat, and jingle when handled.
Run this quick check on any finished piece:
- Does it feel heavier than expected for its size?
- Does the metal reflect light with depth rather than a flat shine?
- Do the gemstones have color variation and internal texture?
- Do clasps and findings match in tone and finish?
- Does it sit flat without twisting?
If a piece fails two or more checks, the problem is materials, not design. Swap the findings and test again.
Photography and Lighting: Making Your Jewelry Look Professional
Photography and lighting change how a piece reads more than any other factor, and most makers get it wrong. Harsh direct light flattens texture and amplifies every scratch. Soft, diffused daylight from a north-facing window shows luster and depth accurately.
Set your piece on a matte surface, not a reflective one. Use a white foam board as a bounce card to fill shadows. Shoot at a slight angle so the metal catches light without blowing out highlights. The Smithsonian Institution’s object photography resources recommends diffused lighting and neutral backgrounds for documenting small metalwork, principles that apply directly to jewelry.
Your jewelry projects look cheap for specific, fixable reasons: cheap findings, inconsistent finishing, and cluttered design. Fix those three and the same designs suddenly read as professional. Craft Living Artistry curates kits, cords, beads, and maker tools so you can source matching findings and quality components in one convenient place. Our focused selection helps you bring your creative ideas to life. Get started with Craft Living Artistry and turn your next project into one you’re proud to show.
Frequently Asked Questions
What are the most common mistakes that make handmade jewelry look cheap?
The biggest culprits are poor craftsmanship like uneven wire wraps and visible glue, low-quality base metals that tarnish quickly, and plastic or fake gemstone components. Over-stacking too many elements also creates a cluttered look. Using the best jewelry findings for beginners, such as sterling silver or gold-filled clasps, and focusing on clean finishing techniques will instantly elevate your work.
Does using low-quality findings make jewelry look cheap?
Yes. Low-quality findings often have thin plating that wears off, revealing dull base metal underneath. They may also feel lightweight and flimsy. Investing in sterling silver, gold-filled, or nickel-free brass findings from a curated supplier ensures your pieces maintain their luster and durability. Quality findings are one of the best jewelry making mistakes to avoid.
How can I make my DIY jewelry look more professional?
Focus on jewelry finishing techniques for a high-end look: file sharp wire ends, use crimp covers, and polish your metal components. Choose consistent materials like sterling silver or gold plating across the piece. Pay attention to proportions and avoid over-stacking. Photographing your jewelry with proper lighting also helps it appear more polished and marketable.
What is the difference between costume jewelry and high-quality handmade pieces?
Costume jewelry typically uses base metals like brass or copper with thin plating, plastic stones, and mass-produced components. High-quality handmade pieces feature sterling silver, gold-filled, or solid gold components, genuine gemstones, and careful craftsmanship. The weight, luster, and finish of high-quality pieces are noticeably superior, and they resist tarnish and oxidization far better over time.



0 Comments