
Table of Contents
- What Is the Difference Between Clay Types?
- Best Pottery Clay for Beginners 2026: Top Picks Compared
- 1. Laguna B-Mix 5 Stoneware Clay — Best Overall for Beginners
- 2. AMACO Buff Stoneware Clay 46 — Best for Hand-Building
- 3. Rocky Mountain Clay Speckled Buff — Best for Visual Character
- 4. AMACO Low Fire White Art Clay No. 25 — Best for Low-Fire Studios
- 5. DAS Air-Hardening Modeling Clay — Best No-Kiln Option
- Best Stoneware Clay for Wheel Throwing
- How to Wedge Clay for Beginners
- Firing Temperature, Cone Ranges, and Studio Compatibility
- Cost-Per-Pound Analysis and Sustainability
- Troubleshooting Drying and Cracking for Beginners
- Choosing the Best Pottery Clay for Beginners: Final Verdict
- Frequently Asked Questions
Last Updated: August 24, 2026
Choosing the best pottery clay for beginners 2026 determines whether your first projects succeed or crumble. The single most important thing beginners get wrong is buying clay without knowing their kiln’s firing temperature, get that wrong and your finished pieces are unfireable, no matter how beautiful they look wet.
This guide covers the three main clay families, ranked top picks with honest pros and cons, cost-per-pound breakdown, and troubleshooting for the drying and cracking problems that derail most beginners in their first month.
What Is the Difference Between Clay Types?
The three main pottery clay types are earthenware, stoneware, and porcelain, each with distinct firing temperatures, textures, and skill requirements.
Earthenware: Low-Fire and Forgiving
Earthenware fires between Cone 06 and Cone 3 (roughly 1828°F to 2104°F) and is one of the most forgiving options for beginners. The clay is naturally plastic, responding well to hand pressure without cracking under manipulation. The main limitation: unglazed earthenware is porous after firing, so pieces for food or liquid use must be fully glazed. Many community studio kilns fire at low-fire temperatures, making earthenware practical for shared studio environments.
Stoneware: The Beginner’s Workhorse
Stoneware fires at mid-fire to high-fire temperatures, typically Cone 5 through Cone 10 (roughly 2167°F to 2381°F) (peer-reviewed research). After vitrification, it becomes dense, durable, and largely non-porous, ideal for functional ware like mugs, bowls, and plates. Most stoneware contains grog, a pre-fired ceramic material ground into particles and added to reduce shrinkage and improve structural integrity during drying (edu). Stoneware is widely considered the best clay type for beginners planning functional pieces with mid-fire kiln access.
Porcelain: High Reward, Higher Skill Floor
Porcelain fires at high temperatures, generally Cone 6 to Cone 10, producing a translucent, glass-like finish. The trade-off is workability: porcelain has lower plasticity than stoneware, tears more easily on the wheel, and punishes inconsistent technique. Most experienced potters recommend beginners avoid porcelain for their first six months.
Best Pottery Clay for Beginners 2026: Top Picks Compared
The best pottery clay depends on your technique, kiln access, and project goals.
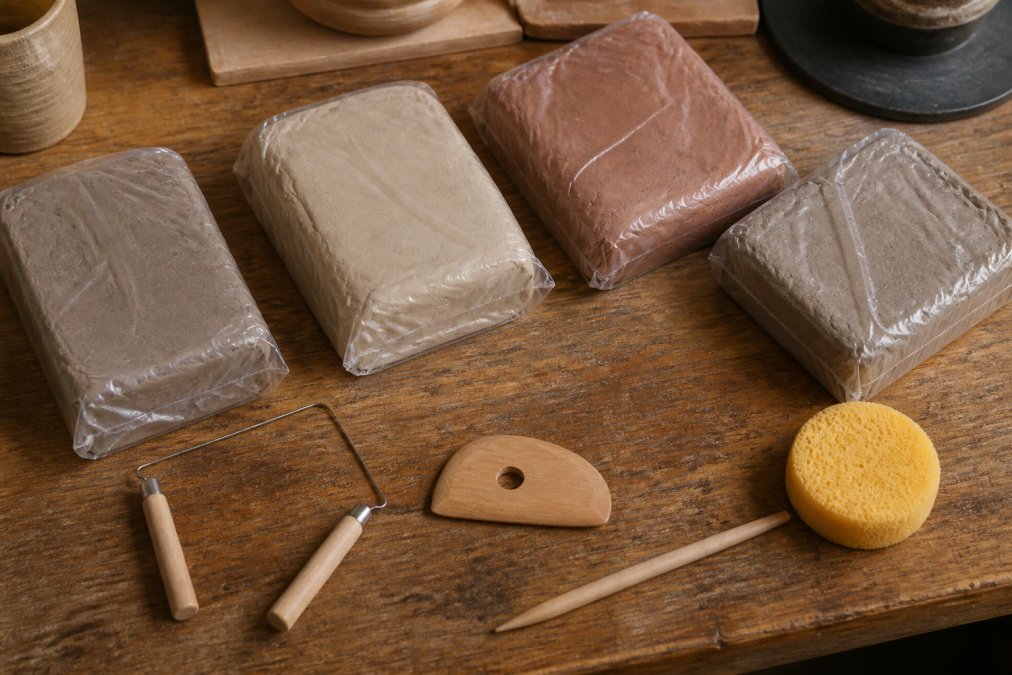
Quick Picks:
- Best Overall: Laguna B-Mix 5 Stoneware — smooth, forgiving, works for both wheel and hand-building
- Best for Hand-Building: AMACO Buff Stoneware Clay 46 — grog content keeps slabs and coils structurally sound
- Best Speckled Effect: Rocky Mountain Clay Speckled Buff — easy to throw, beautiful through-glaze speckle
- Best Low-Fire Option: AMACO Low Fire White Art Clay No. 25 — superb plasticity, economical to fire
- Best No-Kiln Option: DAS Air-Hardening Modeling Clay — air-dries in 72 hours, no equipment needed
1. Laguna B-Mix 5 Stoneware Clay — Best Overall for Beginners
Laguna B-Mix 5 is the clay most often recommended in community studios: smooth, creamy white in oxidation, and genuinely forgiving on the wheel. It fires to Cone 5-6, aligning with most community and school kilns. Plasticity is excellent, responding to hand pressure without tearing during centering or pulling walls. Shrinkage rate is predictable, helping you anticipate changes between wet clay and bisque fire.
Pros: Excellent plasticity, versatile for wheel and hand-building, produces durable functional ware, consistent color.
Cons: Requires mid-fire kiln (Cone 5-6). Not suitable for low-fire-only studios.
2. AMACO Buff Stoneware Clay 46 — Best for Hand-Building
AMACO Buff Stoneware Clay 46 is the strongest choice for slab work, coil building, and pinch pots. Medium grog content gives structural integrity during construction. Its firing range spans Cone 5 to Cone 10, offering flexibility between studios. The warm buff color works well under clear and colored glazes.
Pros: Medium grog supports hand-built forms, wide firing range, takes glazes well.
Cons: Slightly coarser texture than B-Mix, which some beginners find less comfortable for intricate detail work.
3. Rocky Mountain Clay Speckled Buff — Best for Visual Character
Rocky Mountain Clay Speckled Buff breaks the neutral pattern of most beginner clays: its manganese-free speckles show through glazes, giving finished pieces a handmade character. It fires to Cone 5-7, throws smoothly, and handles hand-building equally well.
Pros: Beautiful speckled aesthetic, smooth to throw despite texture, mid-fire range.
Cons: Not recommended for reduction firing if you want predictable speckle color.
4. AMACO Low Fire White Art Clay No. 25 — Best for Low-Fire Studios
For studios firing only at low temperatures, AMACO Low Fire White Art Clay No. 25 is the strongest option. It fires off-white at Cone 05 to Cone 3, so true glaze colors read accurately without the warm undertone of terracotta. Plasticity is superb, and the clay resists crazing. It is AP certified non-toxic, appropriate for classrooms and family studios.
Pros: Very forgiving, economical to fire, resists crazing, non-toxic certification.
Cons: Unglazed pieces remain porous. All functional pieces must be fully glazed.
5. DAS Air-Hardening Modeling Clay — Best No-Kiln Option
DAS Air-Hardening Modeling Clay removes the kiln access barrier. It air-hardens within 24 hours and reaches full hardness within 72 hours without baking or firing (peer-reviewed research). Once dry, pieces can be painted, stained, or sealed. DAS is not a substitute for kiln-fired functional ware, but for sculptural projects and introductory hand-building, it is a legitimate starting point.
Pros: No kiln required, easy to work with, non-staining, AP certified non-toxic.
Cons: Not food-safe or waterproof. Not suitable for wheel throwing.
| Clay Body | Firing Type | Cone Range | Best Technique | Best For |
|---|---|---|---|---|
| Laguna B-Mix 5 | Mid-fire kiln | Cone 5-6 | Wheel + hand-build | Overall best beginner choice |
| AMACO Buff Stoneware 46 | Mid to high-fire kiln | Cone 5-10 | Hand-building | Slabs, coils, structural forms |
| Rocky Mountain Speckled Buff | Mid-fire kiln | Cone 5-7 | Wheel + hand-build | Visual character, speckled finish |
| AMACO Low Fire White No. 25 | Low-fire kiln | Cone 05-3 | Wheel + hand-build | Low-fire studio access |
| DAS Air-Hardening | No kiln | Air-dry | Hand-building only | No kiln access, sculpture |
Best Stoneware Clay for Wheel Throwing
The best stoneware clay for wheel throwing is Laguna B-Mix 5, with Rocky Mountain Clay Speckled Buff as a close second. Both offer the plasticity and moisture content wheel throwing demands.
Wheel throwing requires high plasticity. Low-plasticity clays tear when you open the floor, crack when pulling walls, and collapse under uneven pressure. Stoneware with fine to medium grog hits the right balance: plastic enough to respond to hand pressure, textured enough to maintain structural integrity as walls rise.
If your stoneware arrives stiff, wrap it tightly in plastic and leave it for 48 hours. Moisture redistributes through the clay body, improving workability when you sit down at the wheel.
How to Wedge Clay for Beginners
Wedging is kneading clay to remove air pockets and create uniform consistency before throwing or hand-building. Air pockets trapped in clay explode in the kiln, cracking or shattering pieces.
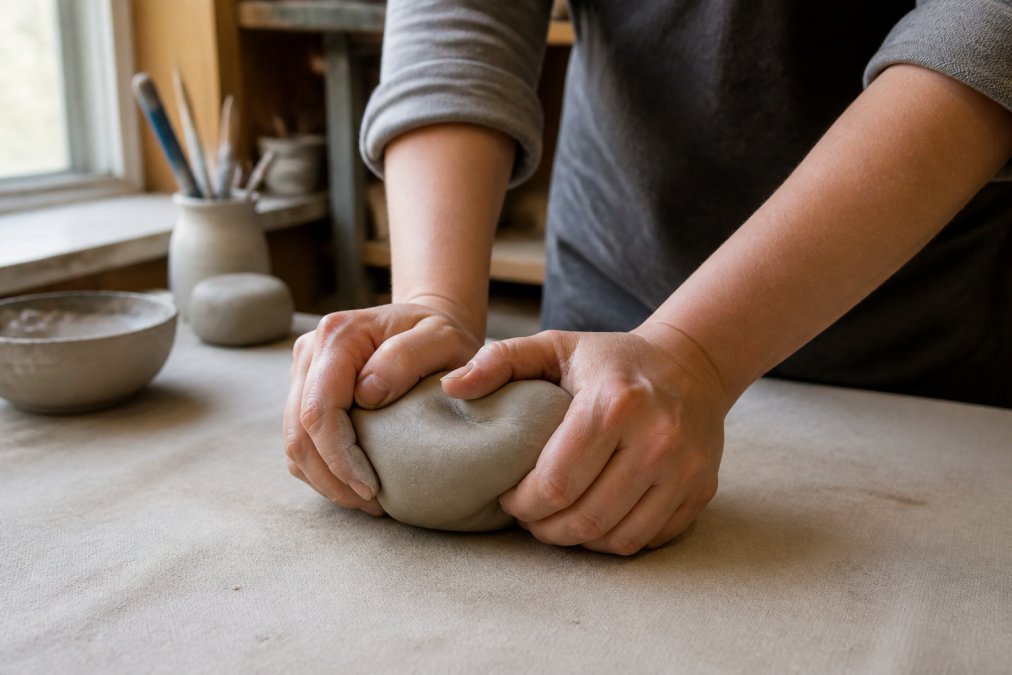
Ram’s Head Wedging
- Place clay on a canvas-covered surface. Canvas absorbs excess moisture and prevents slipping.
- Push down and forward with the heel of both hands simultaneously.
- Rotate the clay a quarter turn after each push.
- Repeat for 50 to 100 repetitions until the clay surface shows a smooth, spiral pattern.
- Cut the clay in half with a wire tool. A uniform cross-section with no bubbles means it is ready.
A common mistake is under-wedging. Twenty repetitions feels like enough, but 50 is the realistic minimum for fresh stoneware. Wedging on a slippery surface causes the clay to slide rather than compress, canvas is correct.
Never skip wedging to save time. A single air pocket can cause catastrophic cracking during glaze firing.
Firing Temperature, Cone Ranges, and Studio Compatibility
Firing temperature is the most practical factor in choosing clay, and beginners most often overlook it. Every kiln fires within a specific cone range, and your clay body must match that range or pieces will underfire (weak, porous) or overfire (warped, bloated).
The cone system measures heat work in a kiln, accounting for both temperature and rate of increase. The three practical ranges for beginners:
- Low-fire (Cone 06 to Cone 3): Earthenware and low-fire clays. Many community studios and school kilns operate here. Economical to fire. Finished pieces are porous unless fully glazed.
- Mid-fire (Cone 4 to Cone 6): Most common in community studios. Most stoneware clay bodies fire here. Produces durable, largely vitrified ware.
- High-fire (Cone 8 to Cone 10): Less common in community studios. Produces the most durable, fully vitrified pieces.
Before you buy clay, confirm the cone range of your kiln. This is the single most important compatibility question. Most community studios post kiln specifications online or answer by email.
Cost-Per-Pound Analysis and Sustainability
Clay is sold in 25 lb or 50 lb bags, and cost-per-pound varies significantly between clay bodies and suppliers. Rocky Mountain Clay Speckled Buff costs approximately $0.92 to $0.94 per pound, while Standard Ceramic Clay 112 Brown runs approximately $0.50 to $0.51 per pound in 50 lb bags. AMACO Low Fire White Art Clay No. 25 costs approximately $1.00 to $1.13 per pound.
Real cost includes kiln firing costs, studio membership fees, and tools. Many studios charge per-pound firing fees, so lower-cost clay fired frequently can cost more in total than premium clay fired less often. Reclaiming clay scraps, collecting dry trimmings, slaking them in water, and wedging reclaimed clay back to workable consistency, reduces waste significantly and is standard practice in well-run studios.
Reclaiming your clay scraps is both the most sustainable and most economical practice. A 50 lb bag goes further when you reclaim trimmings.
Troubleshooting Drying and Cracking for Beginners
Cracking during drying almost always traces back to uneven drying, uneven wall thickness, or clay worked too wet.
Uneven Drying
Clay shrinks as it dries. If one part dries faster than another, differential shrinkage creates stress that cracks the clay. Cover pieces loosely with plastic and allow them to dry slowly over several days. Thin sections like rims dry faster than thick bases, so covering the piece with plastic and leaving the base slightly exposed allows the base to catch up.
Uneven Wall Thickness
Thick walls joined to thin walls will crack at the join. Aim for walls roughly the same thickness from base to rim. A needle tool and ruler help check thickness during construction.
Clay Worked Too Wet
Over-wetting clay during wheel throwing is common. Water lubricates the surface but excess water softens the clay and increases shrinkage stress. Use water sparingly and allow pieces to firm to leather-hard stage before attaching handles or feet.
| Problem | Likely Cause | Fix |
|---|---|---|
| Rim cracks during drying | Rim drying faster than base | Cover rim with plastic, leave base open |
| Handle cracks at join | Handle attached too wet or too dry | Attach at leather-hard stage, score and slip |
| S-crack in base | Uneven compression during floor opening | Press base firmly during centering |
| Wall cracks vertically | Uneven wall thickness | Check thickness with needle tool throughout |
| Surface crazing after firing | Glaze and clay body mismatched | Switch to a glaze matched to your clay body |
Choosing the Best Pottery Clay for Beginners: Final Verdict
The best pottery clay for beginners in 2026 is Laguna B-Mix 5 Stoneware for anyone with mid-fire kiln access. Its plasticity, workability, and versatility make it the most forgiving starting point. For hand-building specialists, AMACO Buff Stoneware Clay 46 offers better structural support. For beginners without kiln access, DAS Air-Hardening Modeling Clay removes the equipment barrier.
The decision tree is straightforward:
- Do you have kiln access? If no, choose DAS Air-Hardening or Crayola Air Dry Clay.
- What cone range does your kiln fire? Match your clay body to that range first.
- What technique are you learning? Wheel throwing benefits from smooth, high-plasticity bodies like B-Mix 5. Hand-building benefits from grog content like AMACO Buff Stoneware 46.
- What is your budget per pound? Rocky Mountain Speckled Buff offers strong value with visual character. Standard Ceramic 112 offers the lowest cost-per-pound.
Start with a single 25 lb bag, work through it completely, and you will know more about what you need from the next bag than any guide can tell you in advance.
Picking the right clay is only half the challenge. Getting the right tools, understanding glaze compatibility, and finding a kiln that matches your clay body are the next steps. Craft Living Artistry curates a focused selection of pottery tools, clay supplies, and maker essentials designed to support beginners and semi-professional potters alike, with everything you need available in one place. Visit Craft Living Artistry to find the tools and materials that match where you are in your pottery practice.
== FAQ ANSWERS (audit these too, same rules) ==
[1] Q: What is the best clay for beginner potters?
A: Mid-fire stoneware is the most recommended starting point for pottery clay beginners. It offers high plasticity, forgives mistakes on the wheel, and fires to a durable, near-vitrified finish at cone 5-6. Smooth stoneware bodies like Laguna B-Mix are widely available and compatible with most community studio kilns. If you have no kiln access at all, an air-dry clay like DAS lets you practice hand-building without any firing equipment.
[2] Q: What is the difference between stoneware and earthenware clay?
A: Earthenware fires at low temperatures, typically cone 06-1, and remains porous unless glazed. It is very forgiving and inexpensive to fire, making it a solid choice for beginners with low-fire kilns. Stoneware fires at mid to high temperatures, cone 5-10, and vitrifies into a dense, durable clay body that is naturally water-resistant. For functional ware like mugs and bowls, stoneware is the more practical long-term choice for most beginners.
[3] Q: Do beginners need grogged or smooth clay?
A: For wheel throwing, smooth clay with little or no grog is easier to center and pull because the texture does not abrade your hands. For hand-building with slabs, coils, or pinch pots, a clay body with medium grog provides structural support and reduces cracking during drying. Most beginners starting on the wheel should choose a smooth or fine-grog stoneware, while those focused on hand-building benefit from a medium-grog buff or stoneware clay.
[4] Q: Why is clay plasticity important for wheel throwing?
A: Plasticity describes how easily a clay body bends, stretches, and holds its shape without cracking under pressure. On the wheel, high plasticity means the clay responds smoothly to centering and pulling, letting beginners correct mistakes without the clay tearing. Low-plasticity clay bodies, including many porcelains, crack or collapse before a beginner develops the touch to manage them. Choosing a high-plasticity stoneware gives you more working time and reduces frustration during early sessions.
[5] Q: How do I choose the right firing temperature for my clay?
A: Match your clay’s cone range to the kiln you will actually use. Community studios and ceramic classes typically run cone 5-6 mid-fire electric kilns, so a mid-fire stoneware or earthenware rated for that range is the safest choice. Buying a cone 10 high-fire clay and firing it to cone 6 leaves the clay underfired and porous. Always confirm the firing schedule with your studio before purchasing a bag of clay to avoid wasting materials.
Frequently Asked Questions
What is the best clay for beginner potters?
Mid-fire stoneware is the most recommended starting point for pottery clay beginners. It offers high plasticity, forgives mistakes on the wheel, and fires to a durable, near-vitrified finish at cone 5-6. Smooth stoneware bodies like Laguna B-Mix are widely available and compatible with most community studio kilns. If you have no kiln access at all, an air-dry clay like DAS lets you practice hand-building without any firing equipment.
What is the difference between stoneware and earthenware clay?
Earthenware fires at low temperatures, typically cone 06-1, and remains porous unless glazed. It is very forgiving and inexpensive to fire, making it a solid choice for beginners with low-fire kilns. Stoneware fires at mid to high temperatures, cone 5-10, and vitrifies into a dense, durable clay body that is naturally water-resistant. For functional ware like mugs and bowls, stoneware is the more practical long-term choice for most beginners.
Do beginners need grogged or smooth clay?
For wheel throwing, smooth clay with little or no grog is easier to center and pull because the texture does not abrade your hands. For hand-building with slabs, coils, or pinch pots, a clay body with medium grog provides structural support and reduces cracking during drying. Most beginners starting on the wheel should choose a smooth or fine-grog stoneware, while those focused on hand-building benefit from a medium-grog buff or stoneware clay.
Why is clay plasticity important for wheel throwing?
Plasticity describes how easily a clay body bends, stretches, and holds its shape without cracking under pressure. On the wheel, high plasticity means the clay responds smoothly to centering and pulling, letting beginners correct mistakes without the clay tearing. Low-plasticity clay bodies, including many porcelains, crack or collapse before a beginner develops the touch to manage them. Choosing a high-plasticity stoneware gives you more working time and reduces frustration during early sessions.
How do I choose the right firing temperature for my clay?
Match your clay’s cone range to the kiln you will actually use. Community studios and ceramic classes typically run cone 5-6 mid-fire electric kilns, so a mid-fire stoneware or earthenware rated for that range is the safest choice. Buying a cone 10 high-fire clay and firing it to cone 6 leaves the clay underfired and porous. Always confirm the firing schedule with your studio before purchasing a bag of clay to avoid wasting materials.
This article was written using GrandRanker



0 Comments